When it comes to adding captions to your videos, you've really got four main paths to choose from. You can let an AI tool do the heavy lifting, type them all out by hand, upload a separate caption file (SRT or VTT), or permanently burn them right into the video.
Honestly, the "best" way forward really hinges on what you’re trying to achieve—are you prioritizing speed, dead-on accuracy, or just trying to stay within budget?
Your Quick Guide to Video Captioning Methods
Figuring out the right way to caption your videos doesn't have to be complicated. Once you get the hang of it, you'll see it just boils down to picking the right tool for the job. Each approach has its own quirks and strengths, making one better than another for a quick TikTok versus, say, a polished corporate training video.
Let’s break down the four main ways you can tackle this:
Using Automated AI Tools
This is your fast track. Modern AI tools are surprisingly good at listening to your audio and spitting out a full transcript in minutes. The catch? They aren't perfect. You’ll almost always need to do a quick editing pass to catch weird phrasings, misspellings, or punctuation errors. Think of it as a solid 85-95% head start.
The Manual Approach
This is the old-school, roll-up-your-sleeves method: listening and typing out every single word. It’s undeniably the most time-consuming path, but it gives you absolute control, guaranteeing 100% accuracy. This is the go-to for high-stakes projects where every word has to be perfect.
Uploading Caption Files (SRT/VTT)
If you already have a transcript, you’re halfway there. You can format that text into a special file like an SRT (SubRip Text) or VTT (Video Text Tracks). These simple files contain the caption text along with precise timestamps. You just upload the file alongside your video on platforms like YouTube, and they sync up automatically.
Burned-In (Open) Captions
This one is exactly what it sounds like. The captions are permanently embedded—or "burned"—into the video file itself. Viewers can't turn them off. This is perfect for social media, where videos often autoplay on mute and you need to grab attention immediately without relying on sound.
For most creators I know, the sweet spot is a hybrid approach. Start with an AI-generated draft to save time, then give it a quick human polish to ensure it's accurate and reads well. It’s the best of both worlds.
To get a feel for what’s out there, it's worth checking out some of the best UGC creator tools, since many now offer built-in captioning features that make this process much smoother.
At the end of the day, all these methods start with getting the spoken words into a text format. If you want to get deeper into that side of things, our guide on what is video transcription is a great place to start.
Comparing Your Captioning Options
To help you see everything at a glance, here’s a quick comparison of the different methods.
Ultimately, having a clear picture of these options helps you make a smarter choice from the get-go, saving you a ton of time and potential headaches down the line.
Building an Efficient Captioning Workflow
If you just dive into captioning without a clear process, you're setting yourself up for wasted time and inconsistent results. To really get a handle on adding captions to videos, especially when you're dealing with a lot of content, you need a system you can repeat. Building an efficient workflow isn't about buying the most complex software; it’s about making smart, simple choices upfront that will save you hours down the line.
The first step is picking the right tools for the job. Are you just captioning a single clip for social media, or are you working through an entire library of training videos? For one-off projects, the built-in editors on platforms like YouTube or TikTok might be all you need. But for heavier workloads, dedicated software or an AI-powered platform like Aeon quickly becomes a necessity.
Choosing Your Toolset
The decision between a cloud-based AI tool and desktop software often boils down to two things: collaboration and speed. Cloud tools are fantastic for teams. They let multiple people jump in to review and edit transcripts from anywhere. Desktop apps, on the other hand, can offer more powerful editing features and don't depend on a stable internet connection to get work done.
Here’s a look at the different paths you can take within your workflow.
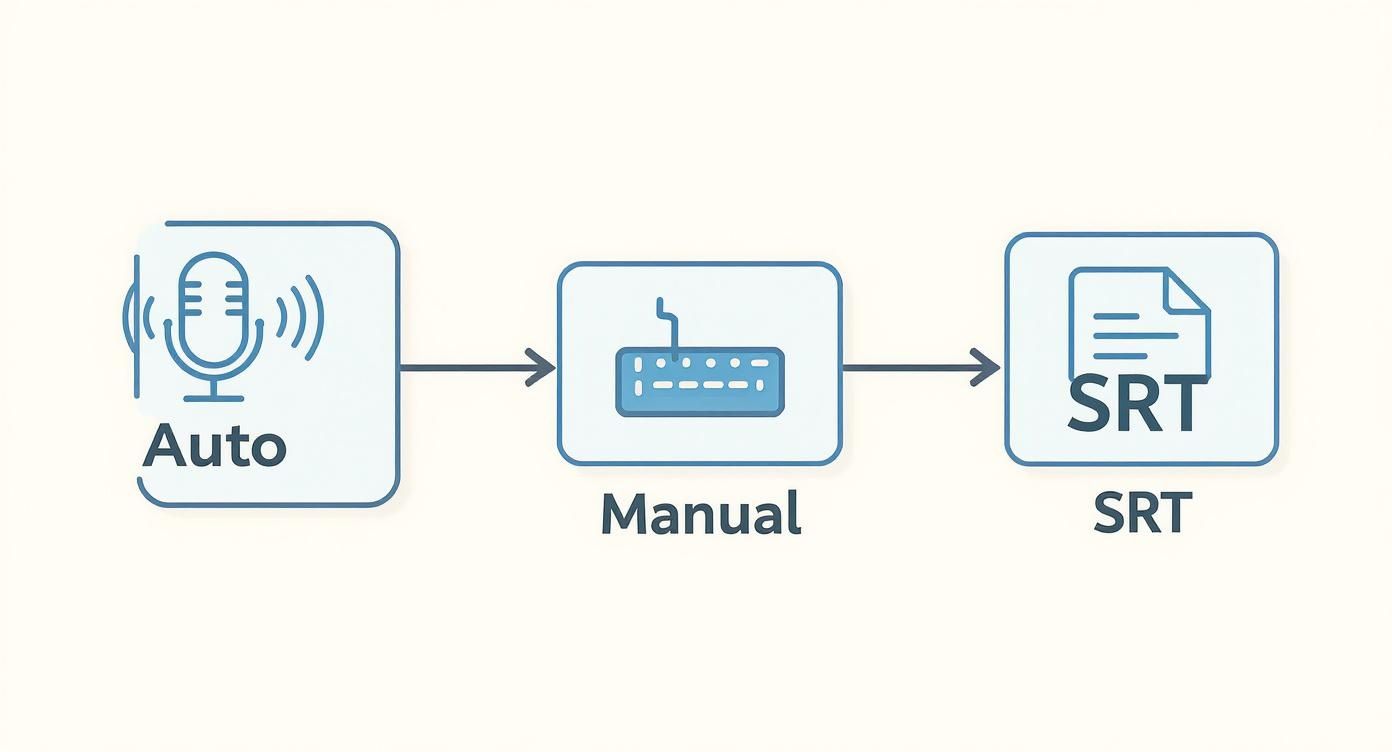
As you can see, every approach—from fully automated to completely manual—ends with a final, accessible video.
The demand for this is only growing. The video captioning market is on track to hit USD 2.5 billion by 2025, driven largely by needs in education and corporate training. This boom is happening because AI is making the process faster and more affordable for everyone. You can learn more about these trends in this detailed video captioning service report.
Prepping Your Files for Success
A little prep work makes a huge difference. Before you even think about generating a transcript, make sure your audio is as clean as you can get it. Things like background noise, quiet speakers, or people talking over each other are the biggest roadblocks to getting an accurate automated transcription.
Pro Tip: If your audio is a bit messy, try running it through a noise-reduction tool first. A few minutes of audio cleanup can easily save you half an hour of tedious transcript corrections later on.
After cleaning up the audio, getting your files organized is the next big win. A messy folder structure is a classic bottleneck that's easy to avoid.
- Consistent Naming Conventions: Get into the habit of using a clear, consistent file naming system. Something like
ProjectName_VideoTitle_Version_Date.mp4makes finding what you need a breeze. - Centralized Storage: Keep everything related to a single project—the video file, audio tracks, transcripts, and SRT files—all in one dedicated folder. No more hunting around.
- Version Control: If you end up with multiple versions of your captions, label them clearly. Think
Captions_v1_DraftandCaptions_v2_Final.
This kind of structured approach is a cornerstone of productivity. For a deeper look at streamlining your entire creative pipeline, check out our guide on how media workflow automation to boost production efficiency. By building these simple habits into your routine, adding captions to videos becomes a seamless part of your production cycle instead of a frustrating chore.
Adding Captions on Different Platforms
Knowing the "how-to" of adding captions is only half the battle. The real challenge is making them work on the specific platforms where your audience actually spends their time. Every social network has its own vibe, its own interface, and its own set of tools for handling text on video. What looks slick and professional on YouTube might feel clunky and out of place on TikTok, so you've got to adapt your strategy.
The demand for captions is exploding, and it's not hard to see why. The captioning and subtitling market hit USD 263.8 million in 2021 and is projected to skyrocket to USD 648.7 million by 2033. This isn't just about accessibility mandates; it's about creators and brands needing to connect with a global audience that often watches on mute. If you want to dive deeper into the numbers, check out this captioning and subtitling market analysis.
Let's break down the practical steps for the platforms that really matter right now.
How to Add Captions to YouTube Videos
Of all the major platforms, YouTube gives you the most powerful and flexible captioning toolkit. This makes sense, given its focus on longer, more detailed content. You can go the easy route and let YouTube do the heavy lifting, or you can take full control for a perfectly polished result.
The quickest way to get started is with YouTube’s built-in automatic captions. Once you upload a video, its speech recognition tech gets to work transcribing the audio. It’s a fantastic starting point, but let’s be real—it’s rarely perfect. You'll almost always need to jump in and manually fix weird punctuation, misspelled names, and industry jargon.
For much better accuracy, uploading your own file is the way to go.
- Upload a Transcript: Got a plain text file of your video's script? You can upload it and use YouTube's "Auto-sync" feature. The platform intelligently matches your text to the audio, handling all the tedious timing for you. It's a massive time-saver.
- Upload an SRT or VTT File: This is the gold standard for professionals. A pre-timed caption file like an SRT gives you absolute, granular control over when every single line of text appears and disappears. The result is a seamless and perfectly synchronized experience for your viewers.
Here's a quick peek at where you'll find these settings inside YouTube Studio.

As you can see, the interface lays everything out clearly, letting you add new subtitles, edit existing ones, or manage multiple languages with ease.
My Personal Tip: Don't start from scratch. Always let YouTube generate the auto-captions first to create a baseline. Then, go into the editor to clean up the mistakes and fine-tune the timing. This hybrid approach saves a ton of time but still gives you the accuracy of a fully manual process.
Captioning for Instagram and TikTok
Unlike YouTube, Instagram and TikTok are different beasts entirely. They're all about short-form, mobile-first video, where captions often feel more like a creative design element than a technical add-on.
On these platforms, captions are almost always "burned-in" (or open), meaning they are a permanent part of the video file itself and can’t be turned off. This is a deliberate choice. Think about it: a huge number of users scroll through their feeds with the sound off. Visually engaging, hard-coded captions are what grab their attention in those crucial first few seconds.
Before diving into the specifics of each, it's helpful to see how their captioning features stack up.
Captioning Features Across Major Platforms
Here’s a quick comparison of what you can expect from each platform’s native captioning tools.
This table makes it clear that while Instagram and TikTok offer flashy styling, YouTube provides the professional-grade control needed for longer, more complex content.
Adding Captions on Instagram
For Reels and Stories, Instagram’s native caption sticker does a decent job of auto-transcribing your audio.
- After you’ve recorded or uploaded your video, tap the "Sticker" icon in the top navigation.
- Choose the "Captions" sticker. Instagram will take a moment to process your audio and generate the text.
- Once the captions appear, you can tap them to cycle through different font styles and cool animations. You can also pinch to resize them and drag them anywhere on the screen.
While this tool is super fast, the editing is a bit clunky. If you find a typo, you have to tap on the text block to correct individual words, which can be frustrating. For a truly polished look, many creators and brands still prefer to burn in their captions using a third-party video editor before uploading.
Nailing Captions on TikTok
TikTok’s process feels a lot like Instagram’s, but its text and caption styling options are more dynamic and deeply woven into the platform's culture.
- After you're done recording, head to the editing screen.
- On the right-hand menu, find and tap "Captions."
- TikTok will auto-generate the text for you. When it's finished, you can go through and edit each line for accuracy.
The real magic on TikTok is in the customization. You can play with tons of different fonts, colors, and text backgrounds to make your captions pop off the screen. Many viral videos use captions as a storytelling tool, animating them to appear word-by-word for dramatic effect or comedic timing. Because of this, learning how to add captions to your TikTok videos is as much a creative skill as it is a technical one.
Automating Captions for Multiple Videos
If you've ever captioned videos one by one, you know the grind. Manually transcribing dozens, or even hundreds, of videos just isn't scalable. It quickly becomes a massive time sink that pulls you away from more creative work.
This is where automation comes in. By setting up a smart workflow, you can batch-process your entire video library, turning hours of tedious labor into a task that runs in minutes. For any team feeling buried under repetitive captioning tasks, building a system that can handle the load is a total game-changer.
Think about it: instead of manually uploading and transcribing each file, a simple script or a serverless function can do all the heavy lifting for you. The core benefit is speed. You can process an entire backlog of content without creating a human bottleneck.
To get started with automation, the first step is picking the right tools for the job.
Cloud Services and Tools
You don't need to build a speech-to-text engine from scratch. Cloud giants like AWS, Google Cloud, and Microsoft Azure offer powerful, ready-to-use APIs. You just send them your audio or video files, and they send back a surprisingly accurate transcript.
- AWS Transcribe is a solid choice, capable of spitting out timestamps, SRT files, and detailed JSON outputs all in one go.
- Google Speech-to-Text is great for handling large batches and can even identify and label different speakers.
- Azure Speech Services integrates smoothly with tools like Logic Apps, making it easy to build automated, serverless pipelines.
These services are built to handle massive volumes with incredible reliability. Once you're set up, you can use a simple script to loop through a folder of videos and kick off a transcription job for each one.
For example, a basic shell script could look something like this:
for file in videos/*.mp4; do
aws transcribe start-transcription-job
--media MediaFileUri="$file"
--language-code en-US
--output-bucket-name my-bucket
done
With a script like that, you can start the captioning process for every video in a folder in less than a minute.
“Setting up a batch caption pipeline cut our turnaround times by 80%. It completely freed up our editors to focus on higher-value creative work instead of just transcribing.”
You can even monitor the progress through a simple dashboard that shows you which jobs are running, which are complete, and how long they took.
Based on our own tests, a typical video completes in under 2 minutes. This kind of efficiency is becoming essential. The captioning and subtitling solutions market, valued at USD 32.17 billion in 2024, is expected to more than double to USD 66.21 billion by 2035. Much of that growth, roughly 60%, is driven by the demand for accessibility and multilingual content.
Building Your Batch Workflow
Once the cloud service has finished transcribing, the next step is to pull the completed files and get them into a usable format like SRT or VTT. This part can be scripted, too.
A basic workflow would be:
- Check the status of your transcription jobs.
- Once a job is complete, find the URL for the output file in the API response.
- Download the transcript file (usually a JSON file).
- Run a simple script to parse the JSON and convert it into a standard SRT or VTT file.
This whole sequence can often be handled in just a few lines of code. For more complex needs, you could use a message queue service like Amazon SQS or Google Pub/Sub. This allows you to build an event-driven system where a new video uploaded to a bucket automatically triggers the entire captioning process.
Automation is a huge leap forward, but don't forget the final, crucial step: quality assurance. Learn how AI captions boost accessibility and SEO in our Aeon article.
Even the best AI isn't perfect, so you'll want to incorporate random spot-checks to verify timing and accuracy. With a solid automated workflow in place, your team can finally stop worrying about the grunt work and focus on what they do best: creating great content.
Next Steps for Automation
Once your system is up and running, a little maintenance goes a long way.
- Keep things updated. Speech recognition models are always improving, so schedule periodic audits to see if you can get better accuracy.
- Monitor for errors. Add logging and alerts to your scripts so you can catch any failures early.
- Document everything. A well-documented workflow makes it easy for anyone on the team to understand, use, and troubleshoot the system.
Caption Styling and Quality Checks

Let’s be honest: great captions are about more than just getting the words right. They need to look good and feel like a natural part of the video. It's about guiding your viewers through the story in a way that reflects your brand’s personality.
Choosing Fonts And Colors
Readability is everything. Your first step should always be choosing a legible font family that holds up across different devices and screen sizes. From experience, sans-serif fonts like Arial or Open Sans are usually a safe bet, especially for smaller mobile screens where clarity is key.
When it comes to emphasis, use bold text sparingly. It’s great for highlighting a key term or a powerful phrase, but overdoing it just creates visual noise.
Contrast is another non-negotiable. Your captions need to pop against the background without clashing. If you're ever unsure, run a quick check against the WCAG guidelines to make sure your color pairings are accessible and easy on the eyes. Little touches, like a semi-transparent background or a subtle drop shadow, can make a world of difference, especially over a busy background.
Here's a quick reference I use for sizing captions based on video resolution, which is a great starting point.
Of course, nothing beats testing these values on actual devices before you lock them in. For a deeper dive into crafting the right voice, you'll find some great tips for writing engaging captions that can help refine your tone and structure.
Positioning And Padding
Where you place your captions matters just as much as how they look. You never want them covering up crucial action or on-screen text.
As a rule of thumb, I aim to keep captions within the lower 15% of the video frame. But this isn't a hard-and-fast rule. In scenes with a lot of movement or existing graphics at the bottom, you might need to nudge them up.
Here’s how to keep things clean and professional:
- Margin Settings: Always maintain at least 5% padding around your captions on all sides. This prevents text from looking cramped or getting cut off.
- Safe Zones: Remember to account for platform-specific overlays. Think about where a channel logo, progress bar, or call-to-action button might appear and position your captions to avoid them.
- Dynamic Adjustments: If your video has chapters or other pop-up text, be prepared to shift your captions to avoid any overlap.
Getting the positioning right ensures your captions enhance the video, rather than getting in the way.
Quality Assurance Checklist
A quick QA pass can be the difference between a professional-looking video and an amateurish one. A single mistimed caption can completely disrupt the viewing experience.
Before you hit publish, run through this quick checklist:
- Sync Issues: Skim through the video to ensure the captions appear and disappear in perfect sync with the audio.
- Typos and Grammar: Give the text one final proofread for any spelling, punctuation, or grammatical mistakes.
- Special Characters: If you're using non-English scripts, double-check that all special characters and accents are displaying correctly.
- Real-World Testing: Watch the video on a few different devices (phone, tablet, desktop) and platforms to see how the captions look in the wild. Testing with the sound off is a must, since that's how many people will see it.
Managing Multilingual Files
If you're creating captions for a global audience, organization is your best friend. Juggling multiple language files can get messy fast if you don't have a system.
Start by creating separate folders for each language, using standard codes like en_US (U.S. English) or es_ES (Spain Spanish). When you save your files, always use UTF-8 encoding to prevent garbled characters in languages that use different alphabets, like Arabic or Hindi.
A clear file naming convention, like VideoTitle.EN.srt or VideoTitle.ES.vtt, will save you a ton of headaches. If possible, have a native speaker do a final proofread before you upload.
Putting in the effort on streamlined styling and a solid QA process can boost viewer engagement by 30%.
These final touches are what make your videos feel polished, professional, and truly accessible to everyone.
Troubleshooting Common Captioning Problems
Even with the most streamlined workflow, you’re eventually going to hit a snag with your captions. It happens to the best of us. Maybe your caption file just won’t import, or you spot that dreaded out-of-sync text that makes a video unwatchable. Don't panic—most of these issues are surprisingly common and easy to fix.
Think of it this way: instead of getting frustrated, you just need a few reliable solutions ready to go. From weird symbols popping up in your text to captions that refuse to load, a little troubleshooting will get you back on track in no time.
Fixing Caption Sync and Timing Issues
There's nothing more distracting than captions that show up way too early or lag behind the speaker. It completely shatters the viewing experience. This "drift" is a classic problem, often happening when a video is tweaked or re-edited after the original captions were created, which throws all the timestamps out of whack.
The fastest way to solve this is by applying a time "offset" in a caption editor. This nifty feature lets you shift all the timestamps forward or backward at once, saving you from a massive headache.
- Positive Offset: Captions appearing too soon? Add time (e.g., +1.5 seconds) to push them back.
- Negative Offset: Captions lagging behind the audio? Subtract time (e.g., -0.75 seconds) to pull them forward.
Most good video editors and dedicated captioning tools have this function built right in. It’s a lifesaver compared to re-timing every single line by hand.
Dealing with File Encoding and Corrupted Characters
Ever open an SRT file and see a jumble of bizarre symbols like â€� where an apostrophe should be? That’s a tell-tale sign of a character encoding mismatch. It’s a geeky-sounding problem, but it just means the file was saved in one text format (like ANSI) but the software reading it expects another (like UTF-8).
The universal fix is almost always the same: open your SRT file in a simple text editor (Notepad on Windows or TextEdit on Mac) and re-save it, making sure to select UTF-8 encoding.
Seriously, this one simple step solves garbled text issues about 99% of the time. UTF-8 is the gold standard for a reason—it supports a huge range of characters and is recognized by pretty much every platform out there.
Handling Overlapping Captions
Sometimes you'll see one caption linger on-screen for too long, crashing into the next one that appears. This creates a messy, overlapping pile of text that’s incredibly hard to read and just looks unprofessional.
This mess usually happens because of incorrect end timestamps in your caption file. To fix it, you'll need to roll up your sleeves and open the file in an editor. Scan through the timestamps and look for any place where a caption's start time comes before the previous caption's end time.
Simply adjust the end time of the first caption so it disappears just before the next one starts. Leaving a tiny, natural-feeling gap is key. It can feel a bit tedious, but cleaning up these overlaps is absolutely crucial for readability.
Your Video Captioning Questions, Answered
Even after you've got your captioning workflow down, a few questions always seem to surface. Let's walk through some of the most common ones I hear from creators to clear up any confusion and help you get it right every time.
Are Automated Captions Good Enough?
This is the big one, and the honest answer is: it depends entirely on the context.
For a quick Instagram Story or an informal internal update, AI-generated captions are often more than enough. They’re incredibly fast and usually hit an accuracy rate between 85-95%, which is great for getting the general point across.
However, if you're creating professional training materials, content with heavy technical jargon, or anything that needs to meet strict legal compliance, you absolutely need a human to review it. Think of the AI as your super-fast first assistant—it does the heavy lifting, but you need to come in for that final polish.
A hybrid approach is what most pros I know swear by. Let an AI tool like Aeon handle the initial transcription and timing. Then, you or a team member can just swoop in to clean up the last 5% of errors. It's the best of both worlds: speed and accuracy.
What's the Difference Between Open and Closed Captions?
This is a fundamental distinction that really changes how your audience interacts with your video.
-
Closed Captions (CC): These are the captions viewers can turn on or off themselves. They exist as a separate file or track, giving the user control. This is the standard for platforms like YouTube and is essential for meeting official accessibility guidelines.
-
Open Captions (or "Burned-In"): These are permanently part of the video image—you can't turn them off. This style has become the default on social feeds like Instagram and TikTok, where videos autoplay on mute and the text is a critical design element.
Your choice really boils down to the platform and how much control you want to give your viewers.
Do I Legally Have to Add Captions?
The legal side of video accessibility is getting more serious every year. In the U.S., for example, laws like the Americans with Disabilities Act (ADA) often require public organizations, schools, and many businesses to make their video content accessible. And it's not a small audience—over 50% of Americans use captions for various reasons, not just hearing loss.
While a small personal blog probably won't get a lawsuit, any business or public-facing brand should make captioning a non-negotiable part of their video process. It’s not just about avoiding legal trouble; it’s about making sure your message can connect with the widest possible audience.
Ready to stop the tedious, one-by-one captioning process? Aeon uses AI to help you build a scalable system that turns your raw content into perfectly captioned videos in minutes, not hours. See how our platform can streamline your entire workflow from start to finish.