Before you even think about firing up your editing software, let’s talk strategy. It’s the part everyone wants to skip, but it’s the single biggest difference between a highlight reel that people actually watch and one that gets scrolled past in a second.
A truly great highlights video isn't born in the edit; it's planned. The magic happens when you define your goal, get inside your audience's head, and sketch out a simple story arc before you even look at a single clip.
The Strategic Mindset for Creating Highlight Videos
Thinking like a strategist from the get-go is what separates the pros from the amateurs. It’s not about having the fanciest software. It’s about the thinking that happens before you click "New Project."
The first and most important question you have to answer is this: What is this video supposed to achieve?
That answer becomes your North Star. It guides every single creative choice you'll make. Are you trying to get an athlete noticed by recruiters? Or maybe you're recapping a conference to sell tickets for next year's event. Perhaps it's a product feature video designed to boost sales. Each of those goals demands a completely different video.
Defining Your Purpose and Audience
Once you've nailed down your "why," it’s time to focus on "who." Who are you actually making this for? A highlight video for potential investors is going to look and feel worlds apart from one aimed at your followers on TikTok. The tone, pacing, and message have to be tailored.
Think about what your specific audience wants to see:
- For Skill Showcases: Recruiters or scouts want undeniable proof of talent. Your job is to serve up the best plays and most impressive moments on a silver platter. Cut everything else.
- For Event Summaries: Attendees and prospects want to feel the buzz and get the key takeaways. You need to capture the atmosphere, snag a few quick testimonials, and showcase those unforgettable moments.
- For Product Highlights: Customers are looking for a solution. They need to see how your product solves a real problem or improves their life. Use clips that show its value in action.
The most effective highlight videos aren't just collections of good moments; they are carefully constructed arguments designed to persuade a specific viewer.
To help you get started, we've put together a quick table outlining the foundational pillars of your video strategy.
Foundational Strategy for Your Highlight Video
This table is a quick reference for the strategic pillars to establish before you start collecting footage.
Answering these questions first sets you up for a much smoother and more effective production process.
Building a Simple Narrative Arc
Every great video tells a story, even if it's only 30 seconds long. You don't need a complex plot, just a simple structure: a beginning, a middle, and an end. This basic arc makes your content far more engaging and easier for the human brain to process.
Your beginning needs a powerful hook to stop the scroll. The middle is where you build momentum with your strongest clips. And the end should provide a satisfying conclusion or a crystal-clear call to action.
Part of this strategic thinking is also about being efficient. You'll want to streamline your video creation process to make sure your great ideas don't get stuck in production bottlenecks. Considering that 89% of businesses now use video as a marketing tool, getting this right is more critical than ever. If you want to dive deeper, you can discover more social media video insights that explain why marketers are so invested in formats like explainer videos.
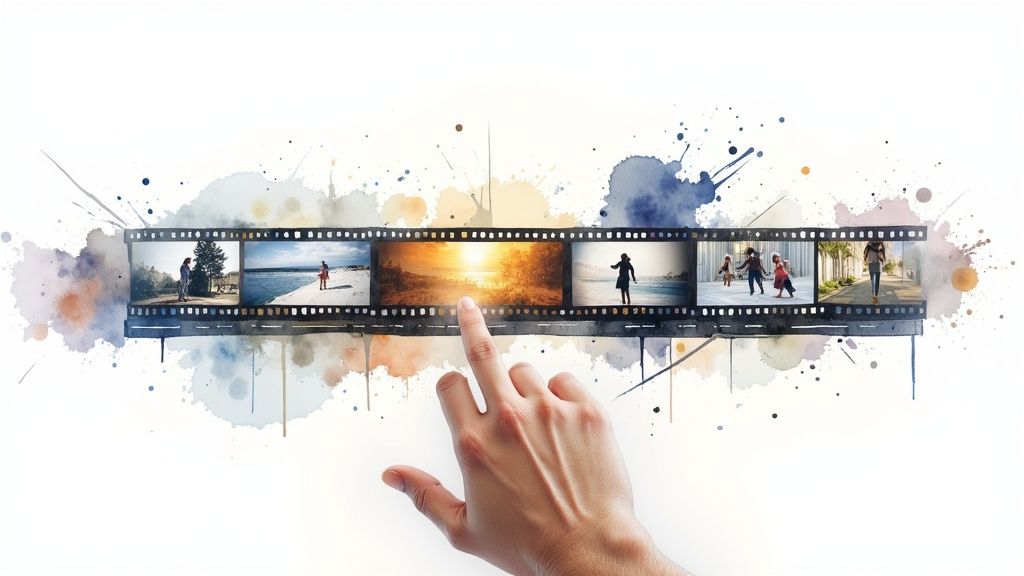
Sourcing and Organizing Your Raw Footage
Long before you even think about making your first cut, the real work begins. The foundation of a killer highlight video isn’t laid in the editing suite; it’s built with the raw footage you collect and—this is the crucial part—how you organize it. This isn't just about dumping files into a folder. It’s about creating a smart, structured library that makes the creative part of editing feel effortless, not like a chore.
Think of it this way: you wouldn't just throw all your books in a giant pile and hope to find the right one later. You’d have a system. The same logic applies here. We need to move past generic filenames and start logging our clips with descriptive, searchable details.
From Chaos to Clarity: The Art of Clip Logging
A well-organized media library is your secret weapon. I can't tell you how many hours I've seen editors waste, scrubbing endlessly through footage to find that one perfect shot they vaguely remember. A simple logging system is the cure for that headache.
You can use a basic spreadsheet or even your editing software’s built-in metadata features to tag each clip. For instance, instead of labeling a clip "Goal," get specific. Try something like "Wide Shot - Game-Winning Goal - Player Celebration - Crowd Reaction." That level of detail lets you filter and find exactly what you need in seconds.
Effective clip logging is the single biggest time-saver in the entire video editing workflow. It turns a frustrating search into a simple, creative choice.
This is a great visual for how a structured workflow should look, taking you from a pile of clips to a story-ready collection.
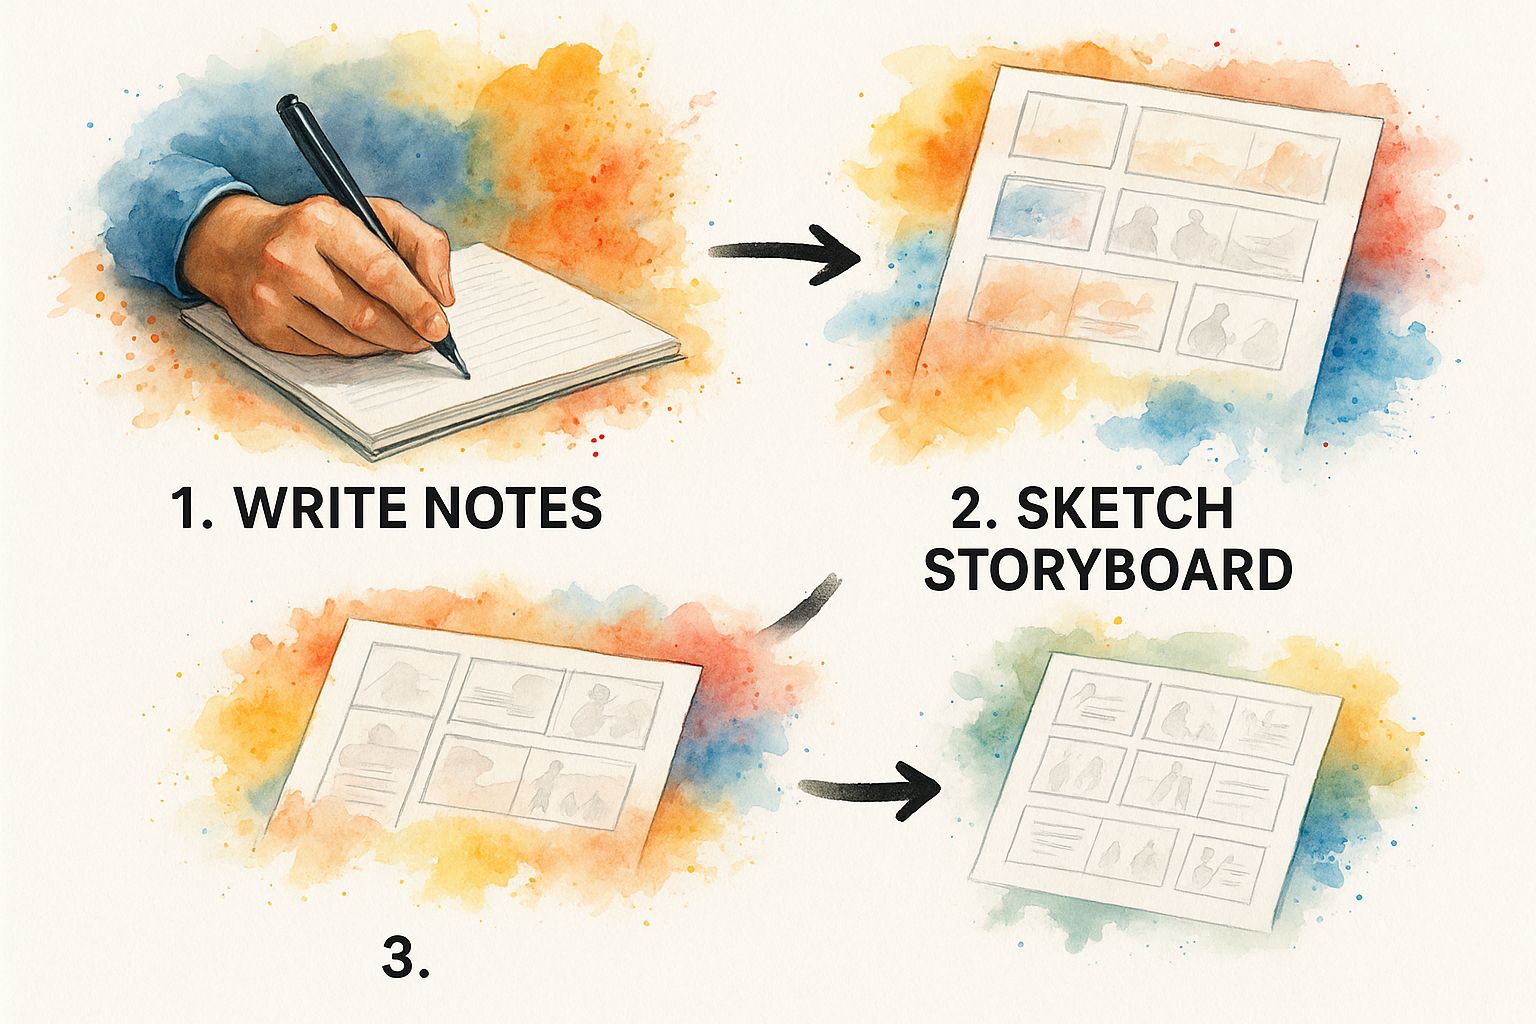
As you can see, combining a storyboard or outline with systematic clip organization creates a direct path to an efficient, more enjoyable editing process.
Think Like an Editor During Filming
The best trick to making a great highlight video is to start thinking like an editor while you’re still gathering your footage. As you review your clips, begin mentally sorting them into narrative buckets that will eventually build your story's arc.
- Inciting Incidents: Look for the moments that kick everything off. This could be the opening kickoff of a game, a provocative question that starts a webinar, or the "before" shot in a transformation story.
- Rising Action: These are your core highlights. This is where you drop in the impressive plays, key data points, or powerful customer testimonials that build momentum and prove your main point.
- Climax: Find that one peak moment. It’s the game-winning shot, the major product reveal, or the emotional high point of an event that delivers the biggest payoff for the viewer.
When you start identifying these story beats early on, you’re no longer just collecting random clips; you’re actually gathering the building blocks for a narrative. This makes assembling the first draft of your video worlds easier. If you're working with spoken content like interviews or webinars, you'll find it incredibly helpful to record and transcribe Zoom conferences, as a searchable transcript is a goldmine for pulling out key quotes and soundbites.
And one final pro tip: always aim for visual variety. A video made up entirely of wide shots feels distant and impersonal. On the flip side, a video with only close-ups can be jarring and confusing. By making sure you capture a healthy mix of wide, medium, and close-up shots, you give yourself the flexibility in post-production to create a dynamic and professional-looking final product that keeps your audience glued to the screen.
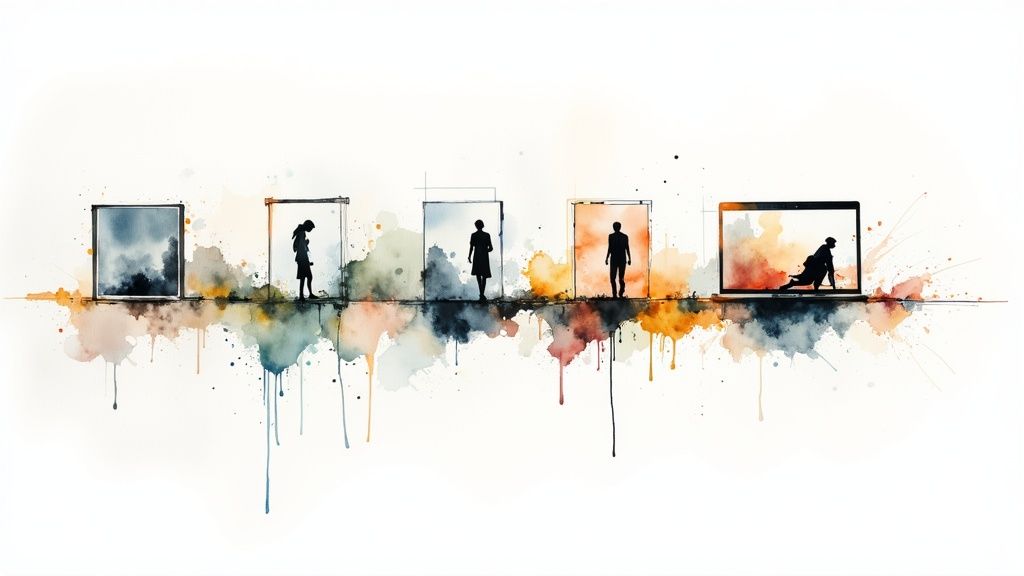
Crafting Your Narrative Through Editing and Pacing
This is where the raw footage transforms and the real magic happens. With your clips sourced and neatly organized, the editing timeline becomes your canvas. This part of the process is about so much more than just trimming clips; it's about molding those individual moments into a story that grabs a viewer's attention and refuses to let go.
The choices you make here—about pacing, the transitions you use, and how you layer in audio—will be the difference between a disjointed mess and a polished, professional narrative.
Honestly, the single most critical element you need to nail is the first three seconds. This is your hook. Its only job is to stop the endless scroll. Always start with your most visually arresting, surprising, or emotionally charged clip. You simply don't have time for a slow-burn intro; you need immediate, undeniable impact.
Mastering the Art of Pacing
Pacing is the heartbeat of your video. It’s the rhythm that pulls the viewer along on an emotional journey. You have complete control over this rhythm through the length of your clips and the speed of your cuts.
Think about a sports highlight reel trying to build excitement. It’s going to use rapid-fire cuts, perfectly timed to an energetic music track. You'll see quick shots of different plays, intense player reactions, and the roaring crowd, all working together to create a thrilling sense of momentum.
On the other hand, a video summarizing a poignant moment from a conference might do the exact opposite. It might let a single, powerful shot linger for several seconds, giving the emotional weight of the moment time to truly sink in.
Pacing isn't just about speed; it's about purpose. A fast pace builds excitement, while a slow pace builds emotion. Your job as an editor is to feel out when to use each to best serve the story you're telling.
Don't be afraid to mix it up. One of the most common mistakes I see is a video that maintains the exact same pace from start to finish. Varying the rhythm is what keeps the viewer engaged and prevents your video from feeling flat and monotonous.
Professional Transitions for a Seamless Flow
How you move from one shot to the next is just as important as the shots themselves. While a simple jump cut has its place, using more sophisticated transitions is what creates that smooth, professional viewing experience we're all after. Two of the most effective and easy-to-learn techniques are J-cuts and L-cuts.
- J-Cuts: This is where the audio from the next clip starts playing just before the video from that clip appears. It’s a fantastic technique for pulling the viewer forward and building a little anticipation for what they're about to see.
- L-Cuts: This is the reverse. The audio from the previous clip continues to play over the beginning of the next one. It's a great way to connect two visually different scenes and create a smooth sense of continuity.
Getting comfortable with these audio-led transitions will instantly elevate the quality of your work. They are the subtle, almost invisible glue that holds a great highlights video together. If you're looking for more ways to build a powerful story, exploring these top video storytelling tips to create engaging content can provide a ton of great ideas.
Ultimately, the goal is to create a video that people actually want to finish. This is especially true for short-form content. Engagement metrics show that around 30% of short-form videos achieve an impressive watch rate of over 81%. That proves that a well-crafted, concise story really can keep an audience hooked. This data just reinforces why every single cut and transition matters in your quest to make a highlights video that people watch all the way through.
Polishing Your Video with Audio and Visuals
https://www.youtube.com/embed/qfHX2cNA4MY
You’ve got the core story locked in. Now it’s time for the final polish. A solid edit is your foundation, but the small details in your audio and visuals are what really make a video feel professional and compelling.
This is where you elevate the production value. Think of it as the last 10% of the effort that creates 90% of the impact. The goal is to make your highlights video look and sound as impressive as the narrative you've worked so hard to build.
First up: creating a consistent visual language through color.
Creating a Cinematic Look with Color
Chances are, your clips were shot at different times and under completely different lighting conditions. This can leave you with a visual patchwork that feels disjointed. Color correction is your first step to unifying everything. You don't need to be a Hollywood colorist—the goal here is simply consistency.
Start by tweaking the basics like exposure, contrast, and white balance. You want every clip in your timeline to feel like it belongs in the same film. Once you have a balanced look, you can apply a subtle color grade. This is a stylistic color preset, often called a "LUT," that gives your video a specific mood.
Whether you're aiming for something warm and nostalgic or cool and modern, this unifying layer adds a cinematic quality that feels intentional and high-end.
A consistent color grade is the invisible thread that ties all your best moments together. It tells the viewer, "This isn't just a collection of clips; it's a cohesive film."
Adding text can also provide crucial context, but you have to do it right. For anyone looking to improve accessibility or add captions, understanding how to transcribe audio to text is a great starting point for generating subtitles quickly.
Adding Context with Graphics and Text
Text overlays and simple motion graphics are fantastic tools for hammering home key information. When used with a bit of strategy, they can guide the viewer's attention without making the screen feel cluttered.
Here are a few ways I like to use them:
- Lower Thirds: Perfect for introducing a speaker, showing a location, or giving a player credit for a killer play.
- Kinetic Typography: Animate important stats or powerful quotes on the screen. It makes them far more dynamic and memorable than static text.
- Callouts: Use simple arrows or circles to pinpoint a specific action or detail, especially in a busy shot.
The key is restraint. Your graphics should always support the story, not steal the show. If you want to get this right, our guide on how to overlay text on video offers some great advice for doing it without sacrificing visual clarity.
Finally, the audio mix. This is where you truly cement the emotional impact of your video. I've seen countless great edits ruined by a bad audio mix.
Your job is to find the perfect balance between three core elements: dialogue (or voiceover), music, and sound effects. Make sure your dialogue is always crisp and clear. The music should set the tone without drowning out the speech. And sound effects? Use them to punctuate key moments and add a layer of realism.
Nailing this balance is what makes a video not just look incredible, but sound incredible, too.
Optimizing and Sharing for Maximum Impact
So, you’ve put in the work and created a fantastic highlights video. That’s a huge win, but the job isn't quite done when the export finishes. The final, and arguably most critical, step is getting that video in front of the right eyeballs.
Without a smart distribution plan, even the most incredible video will just sit there, failing to do its job.
This last phase is all about learning to work with the platform algorithms, not fighting against them. It means tailoring your video to fit the specific environment where it will live and creating packaging—your thumbnail and title—that people can't resist clicking.
Formatting for Every Platform
You can't just throw the same video file everywhere and hope for the best. It doesn't work. Every social platform has its own quirks and preferred formats, and if you want any real reach or engagement, you have to play by their rules. A video that looks perfect on YouTube will feel totally awkward and out of place on TikTok.
The first thing to think about is the aspect ratio. Social media feeds are built for vertical video because that’s how we all hold our phones. It’s no surprise that short-form video is dominating social, with vertical videos boasting a 90% higher completion rate than horizontal ones. If you're curious, you can explore more social media video trends to see just how critical mobile formatting has become.
Here’s a quick-and-dirty breakdown for the main players:
- YouTube: This is still the king of traditional widescreen (16:9). It’s the ideal home for your longer, more detailed highlight reels, event recaps, or in-depth portfolio pieces.
- Instagram & TikTok: These are vertical-first worlds (9:16). Your highlights here need to be fast, punchy, and visually grabbing from the very first second to succeed in a full-screen, sound-on environment.
- LinkedIn & Facebook: These platforms are a bit more forgiving. They handle both square (1:1) and vertical (4:5) video really well in their feeds. I often find that a square video is a fantastic middle ground—it grabs a ton of screen real estate without forcing you into a completely separate vertical edit.
The most successful publishers I know don't just create one video. They create a core "hero" video and then adapt it for each platform. Think of it as creating different "outfits" for the same powerful story, ensuring it always looks its best no matter where it shows up.
The Art of the Clickable Thumbnail and Title
Your thumbnail and title are your video's handshake, its first impression. They are the gatekeepers standing between your content and a potential viewer. It doesn't matter how brilliant your video is; a bland title or a muddy thumbnail will absolutely kill its chances.
What makes a great thumbnail? From my experience, it boils down to a few things:
- Clear and High-Contrast: It has to pop, even when it’s shrunk down to a tiny square on a phone. Use bold colors and clean, uncluttered designs.
- Emotionally Compelling: You want to capture a peak moment of action, a powerful human expression, or a visual that’s so surprising it sparks instant curiosity.
- Contextual: It needs to be an honest preview of the video. Stay away from misleading clickbait. All that does is frustrate your audience and destroy your credibility over time.
Your title has to work in perfect harmony with the thumbnail. It needs to be both intriguing and informative. Try framing it as a question, teasing a key result, or using powerful, descriptive words that create a little excitement. Instead of something generic like "Event Highlights," go for "You Won't Believe What Happened at Our 2024 Summit."
This one-two punch of a striking thumbnail and a curiosity-piquing title is your secret weapon for earning that click. It’s a make-or-break part of knowing how to make a highlights video that people actually watch. Don't treat them as an afterthought—plan them from the start.
Common Questions About Making Highlight Videos
As you start your journey into creating highlight videos, you'll find that a few questions tend to surface right away. I've been there. Getting a handle on these common sticking points early on can save you a ton of headaches and help you build a solid workflow from day one.
Let's walk through some of the most frequent questions I hear.
What Is the Ideal Length for a Highlight Video?
This is the big one, and the honest answer is always: it depends on where you're posting it. There's no magic number, but there are definitely smart guidelines for different platforms.
- For fast-paced social feeds like TikTok or Instagram Reels, you have to be brief. Really brief. Aim for under 60 seconds, but the real sweet spot is often between 15-45 seconds.
- For YouTube or your own portfolio website, you can stretch your legs a bit. A video that's 1-3 minutes long works well. That gives you enough time to build a small narrative arc and show off a good range of clips without your audience's attention wandering.
The golden rule? Be as short as you possibly can while still telling a complete, compelling story. Don't add fluff just to hit a time marker. Every single second needs to earn its place in the final cut.
How Do I Choose the Right Music?
Music is everything. It's the emotional core of your video. The right track can elevate your clips into something truly epic, but the wrong one can make the whole thing feel disconnected or even a bit cheap.
First, think about the mood. Are you aiming for something high-energy and motivational? Or is it more of a heartfelt, emotional piece? Once you know the feeling you're after, head to a royalty-free music library and use those keywords in your search.
Here's a pro tip: always listen to the entire track before you commit. A song might have a slow, quiet intro but build to an intense crescendo, and you need to know if that energy shift aligns with the story you're telling.
And this is non-negotiable: never use copyrighted music unless you've paid for a proper license. It’s just not worth the risk of legal issues, having your video taken down, or getting demonetized.
What Are the Most Common Mistakes to Avoid?
I see a lot of people making the same handful of mistakes when they first start out. Just knowing what these traps are is half the battle. The top three I consistently see are:
- Poor Clip Selection: This is the most common one. Using footage that's shaky, low-quality, or just doesn't add anything to the story you're trying to tell.
- Bad Pacing: The edit either drags on, boring the viewer, or it's so frantic and chaotic that nobody can follow what’s happening.
- Weak Audio: This includes music that doesn't fit, distracting background noise from the original clips, or sound levels that are all over the place. It just screams "amateur."
You can sidestep most of these issues by focusing on a clear narrative, finding an engaging rhythm in your edit, and making sure your audio is clean and crisp. This is all part of the craft of learning how to create engaging content that truly works.
Finally, don't let a lack of fancy gear stop you. You can absolutely create a killer highlight video with user-friendly, even free, software. Your eye for a good story and your editing choices are far more powerful than the price tag on your tools.
Ready to turn your best content into engaging videos without the manual effort? Aeon is your solution. Our platform automates the creation of high-quality, on-brand videos from your existing text, audio, or video files, helping publishers scale production and boost engagement. See how it works at https://www.project-aeon.com.