Learn how to compress videos without losing quality. Our guide shares the best settings and free tools to reduce video file size for any platform.
Dan Benyamin
Jul 24, 2025
In This Article
Subscribe to our newsletter
So, you want to learn how to compress a video? It's actually a pretty simple concept. You just need the right software to shrink a video's file size by tweaking its resolution, bitrate, or file format (often called the codec).
This whole process turns those massive video files into something much smaller and way easier to share, upload, or just store—often without a noticeable hit to the visual quality.
Why Bother With Video Compression Anyway?
Ever tried to email a video from your phone, only to get that dreaded "file too large" error? We've all been there. It’s a perfect example of why knowing how to compress a video is a crucial skill for pretty much anyone working with digital video today.
Whether you're a content creator uploading 4K footage to your channel or part of a team trying to manage storage costs for raw project files, one thing is certain: big videos create big problems.
But this isn't just about saving space. Good compression is really about making your content accessible to everyone. A properly compressed video guarantees a smooth viewing experience for your audience, preventing that buffering wheel of death that absolutely kills engagement. It ensures your hard work can be seen on any device, no matter how fast or slow someone's internet is.
The Bedrock of Modern Media
Our ability to stream and share video so effortlessly is built on decades of innovation. The idea itself isn't new—compression concepts go back almost a century. But early digital video in the 1970s was a beast. It was incredibly inefficient, demanding bitrates up to 200 Mbit/s just for standard-definition video. That was way beyond what was practical to send over any network at the time.
It was the invention of technologies like the discrete cosine transform (DCT) that truly unlocked modern compression. This laid the foundation for the standards like MPEG and H.264 that power our digital world.
This chart shows how these video coding standards have evolved over the years.
You can see the branching paths, showing how foundational formats like MPEG and the H.26x series grew into the super-efficient codecs we depend on for everything from Zoom calls to 4K streaming.
How Compression Impacts Sharing and Streaming
At the end of the day, efficient compression directly shapes how we watch and share media. Without it, platforms like YouTube and Netflix simply wouldn't exist as we know them. It solves some very real, everyday challenges for both creators and businesses.
Faster Uploads: Smaller files mean you spend less time watching that progress bar crawl across the screen, whether you're uploading to Instagram, TikTok, or your company's server.
Lower Storage Costs: Let's face it, archiving enormous raw video files gets expensive fast. Compression drastically reduces the amount of storage you need to pay for.
Better Accessibility: Compressed videos load much faster, which means people with slower internet connections can actually watch your content without endless buffering.
As you think about the power of compression, it’s also interesting to see how it’s shaping the entire media landscape, including the future of streaming movies. Getting a handle on compression is a fundamental step toward making sure your video content is not just high-quality, but also practical enough to be shared and seen by the world.
Get to Know Your Compression Toolkit
Before you can start squashing video files like a pro, you need to know what you’re actually working with. It's a bit like being a chef—you wouldn't just throw random ingredients in a pot and hope for the best.
Understanding a few key terms is the first step. Once you get these down, you'll be able to make smart decisions and find that sweet spot between a tiny file size and crisp, clear video quality.
Think of a video file as a package deal. It’s not just one thing, but a bundle of different data streams. For compression, the three most important parts to get a handle on are the codec, the container, and the bitrate.
What's Inside a Video File?
Let's break down these core components. Grasping this trio is what separates a novice from someone who can consistently produce great-looking, efficient videos.
Codec (The Compression Engine): A codec is short for coder-decoder. This is the algorithm—the engine, really—that does the heavy lifting of shrinking your video data. It compresses the video when you save it and decompresses it when someone hits play. Your choice of codec has the single biggest impact on file size and quality. For most situations, H.264 is the undisputed king. It offers a fantastic balance of quality, file size, and compatibility. Just about every device on the planet can play it.
Container (The Digital Box): The container is the file type that bundles everything together: the compressed video, the audio track, and other data like subtitles or metadata. You can spot it by the file extension, like .MP4, .MOV, or .AVI. It's the digital box holding all the pieces.
Bitrate (The Data Diet):Bitrate is the amount of data used to create one second of video, usually measured in megabits per second (Mbps). This is the main dial you'll be turning to control your file size. A higher bitrate means more data, which translates to better quality but a bigger file. A lower bitrate uses less data, creating a smaller file but potentially sacrificing some visual clarity.
Getting familiar with the different video file types and formats is a crucial part of building your toolkit, as the container you choose often dictates which codecs you can use.
Choosing the Right Tools for the Job
So, how do all these pieces fit together in the real world?
Imagine you’ve just finished a killer promo video and need to get it on YouTube. You'd almost certainly choose the MP4 container because it's universally supported. Inside that MP4 box, you'd use the H.264 codec for its excellent compression. Finally, you’d set a bitrate based on YouTube’s recommendations—say, 8-12 Mbps for a 1080p video—to ensure it looks great without taking forever to upload.
This combination didn't just appear out of nowhere. Video compression has come a long way since the grainy, pixelated clips of the early internet. Standards evolved rapidly from the 1980s, with pioneers like the H.261 codec paving the way for the MPEG standards that made DVDs and digital TV possible. This evolution was what took video from bulky analog tapes to the seamless streaming we enjoy today.
The Key Takeaway: It’s a simple relationship. A codec (like H.264) gets packed inside a container (like MP4), and its final quality is dictated by the bitrate (e.g., 10 Mbps). Master this trio, and you've got total control over your video's final look and size.
To help you visualize how these components relate, here’s a quick comparison of some common formats you'll encounter.
Common Video Codecs and Containers Compared
This table breaks down some of the most popular codecs and containers, showing what they're best for and why you might choose one over another.
Format Type
Name
Primary Use Case
Key Advantage
Container
.MP4
The universal standard for web video, streaming, and social media.
Incredible compatibility; works on virtually any device or platform.
Container
.MOV
Common in professional video editing, especially in Apple ecosystems.
High-quality, often used for master files before compression.
Container
.WebM
A modern, open-source format designed specifically for the web.
Excellent performance in web browsers with smaller file sizes.
Codec
H.264 (AVC)
The most widely used codec for recording, compressing, and distributing video.
The gold standard for compatibility and good quality-to-size ratio.
Codec
H.265 (HEVC)
The successor to H.264, used for 4K/UHD and high-efficiency streaming.
About 50% more efficient than H.264, offering same quality at half the size.
Codec
AV1
A next-gen, royalty-free codec backed by major tech companies (Google, Netflix).
Even more efficient than H.265, but requires more processing power to encode.
Understanding these options is the first step. Now, let's get our hands dirty and start compressing.
Compressing Your Videos with Free Tools
You don't need to shell out for pricey software to get great compression. Honestly, some of the best tools for the job are completely free and pack a serious punch. They're perfect for shrinking down video files without destroying the quality, whether you're emailing a clip to a colleague or uploading a new video to your social channels.
I'm going to walk you through two of my favorite free options that I use all the time: HandBrake and VLC Media Player.
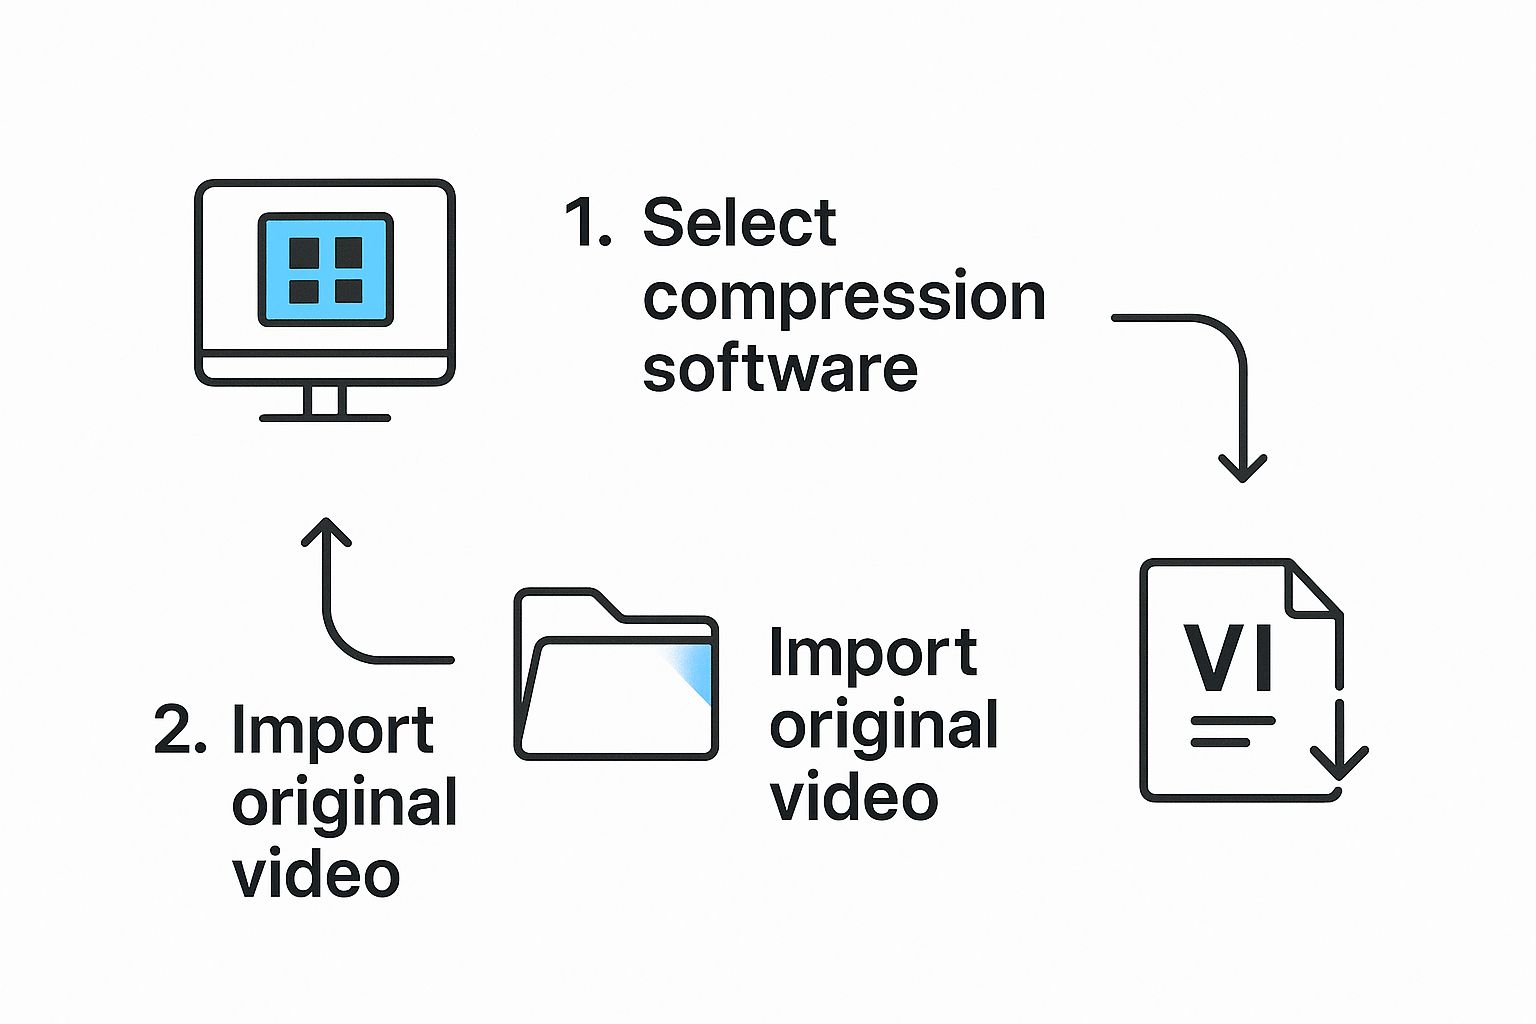
The basic process is pretty much the same, no matter what tool you use. You can see it boiled down to three simple steps here.
It really is that simple: pick your tool, open your video, and export a new, smaller version. The magic happens when you choose your export settings, and that's where we'll focus.
This whole process is the engine that powered the online video explosion. Back in the mid-2000s, as more people got broadband, the need for smaller video files skyrocketed. The release of the H.264 codec in 2003 was a total game-changer. It could shrink videos to about half the size of older formats without a noticeable drop in quality, making services like YouTube and Netflix possible for the masses.
Your Go-To Tool: HandBrake
If you're going to download one tool for this, make it HandBrake. It's a fantastic open-source transcoder that gives you a ton of control, but its presets also make it incredibly easy for beginners.
Don't be intimidated by the interface. For most jobs, you can just stick to the built-in "General" presets.
Fast 1080p30: This is my go-to for just about any 1080p video I need to share on the web. It's a great balance of quality and file size.
Very Fast 720p30: Perfect for when you need a really small file. If 720p resolution is good enough (like for a quick email attachment), this is your best bet.
All you have to do is load your video, pick one of these presets from the panel on the right, tell it where to save the file at the bottom, and hit "Start Encode." That's it. The presets take care of all the technical stuff, using the highly compatible H.264 codec.
Using VLC Media Player for Quick Conversions
You probably already have VLC on your computer. It’s famous for playing any video file under the sun, but it also has a pretty handy conversion feature tucked away. It's ideal for quick-and-dirty compression jobs when you don't want to install another piece of software.
Here’s the trick to finding it:
Open VLC and go to Media > Convert / Save.
Add your video file, then click the "Convert / Save" button.
From the "Profile" dropdown menu, choose Video - H.264 + MP3 (MP4). This is the most universally accepted format.
Finally, choose a destination for your new file and click "Start."
VLC doesn't give you the fine-tuned control that HandBrake does, but you can't beat its convenience for a simple compression task.
Pro Tip: Always, always start with your highest-quality source file when compressing for social media. Every time you re-compress a video, it loses a little more data. If you want to get this right, check out our guide to master video on social media with top tips and strategies.
Let's imagine you have a 500 MB video from a family get-together that you want to email to your relatives. Using HandBrake's "Fast 720p30" preset could easily shrink that file to under 50 MB—small enough for most email providers—and no one will notice the quality difference on a phone or laptop. It’s a practical fix for a very common problem.
When you’re ready to move past the simple, one-click compression tools, you enter a world of incredible precision. This is where professional video editing software like Adobe Premiere Pro and DaVinci Resolve comes in. They offer granular control over every single aspect of your video’s compression.
This isn't just about shrinking a file; it's about mastering its final look, feel, and size for any platform.
These tools are absolutely essential for creators who can't afford to compromise on quality. Instead of just picking a generic preset, you get to dial in the exact settings for any scenario—from a crystal-clear YouTube upload to a broadcast-ready master file.
VBR vs. CBR: The Big Bitrate Decision
The single most important choice you'll make in these programs is your bitrate encoding method. You'll almost always see two main options: Constant Bitrate (CBR) and Variable Bitrate (VBR). Getting this right is fundamental to compressing your videos effectively.
Constant Bitrate (CBR): This is the straightforward option. CBR applies the same, consistent bitrate across your entire video. It’s predictable and easy for computers to process, which makes it a great choice for live streaming where a stable data flow is non-negotiable.
Variable Bitrate (VBR): For most pre-recorded content, VBR is the much smarter approach. It intelligently allocates more data to complex, high-motion scenes and less data to simpler, static shots. The result? A much more efficient file that keeps the quality high right where you need it most.
My Personal Rule: I almost always use VBR 2-Pass. The first pass analyzes the entire video to figure out which parts need a bigger data budget. The second pass then applies the bitrate intelligently based on that analysis. Yes, it takes longer to export, but the quality-to-size ratio is unbeatable for platforms like YouTube and Vimeo.
Practical Export Recipes
Let's get practical. Here are a few of my go-to export settings in Premiere Pro for common situations. Think of these as solid starting points—you should always feel free to tweak them based on your specific footage.
Table: Premiere Pro Export Settings
Scenario
Codec
Bitrate Encoding
Target Bitrate (Mbps)
Maximum Bitrate (Mbps)
Notes
YouTube 1080p
H.264
VBR, 2-Pass
12
16
A great sweet spot for most online content. Balances quality and upload speed perfectly.
YouTube 4K
H.264
VBR, 2-Pass
40
50
Delivers the crisp detail you need for UHD delivery on streaming sites.
Master Archive
ProRes 422
N/A
N/A
N/A
Creates a massive but high-quality file that's perfect for long-term storage or future edits.
YouTube Shorts
H.264
VBR, 1-Pass
10
12
A quick export for vertical content where speed is more important than perfect quality.
These settings give you a reliable baseline for different projects. When editing vertical videos, for example, efficiency is the name of the game. If you want to dive deeper into that specific workflow, check out our guide on how to edit YouTube Short videos like a pro, which covers optimization from start to finish.
The real power of professional software is the ability to tailor your export for its final destination. A video meant for a giant trade show screen needs a much higher bitrate than one for a quick Instagram story. Having this level of control ensures your hard work looks its absolute best, no matter where it’s being watched.
How To Balance Video Quality And File Size
Learning how to compress videos is more than just hitting the “Export” button. True mastery is an art form, a delicate dance between visual quality and manageable file size. It's easy to think that bigger is always better, but chasing the absolute highest numbers is often a mistake. It’s a fast track to wasting storage space and enduring painful upload times.
The real goal is finding the "sweet spot" for your specific video. This is the point where the file is as small as it can be without any noticeable drop in quality for its intended purpose. A video for a massive trade show display needs a completely different approach than a quick clip for an Instagram Reel viewed on a tiny screen.
Find Your Bitrate Sweet Spot
Your main tool for controlling this balance is bitrate. Think of it as the data budget for your video. A higher bitrate means more data per second, which translates to better quality but a much larger file. Lowering the bitrate shrinks the file but can introduce visual artifacts like blockiness or blur, especially in scenes with a lot of movement.
For example, a fast-paced action sequence needs a generous bitrate to stay crisp. On the other hand, a simple talking-head interview can get away with a much lower bitrate because very little changes from frame to frame. Your job is to find the lowest bitrate that still looks professional for your specific content.
Don't fall into the trap of maxing out your settings. For most web videos, compressing a 1080p file with a 100 Mbps bitrate is complete overkill. You’ll end up with a massive file and no real quality improvement over one compressed at 12-16 Mbps.
Pre-Export Quality Checklist
Before you even think about hitting "render," take a moment to run through a quick mental checklist. Thinking about the end user is critical for making smart compression decisions and is a key part of how you can optimize videos to boost engagement and visibility.
Keep these factors in mind:
Final Destination: Where will this video be seen? YouTube's ideal settings are different from those for a video embedded on your company’s landing page.
Audience Connection: Is your audience watching on a blazing-fast office connection or potentially spotty mobile data? Understanding the essential video conferencing bandwidth requirements can shed some light on how compression impacts real-world viewing.
On-Screen Motion: Are you working with a calm interview or an explosive sports highlight reel? Allocate your data budget where it's needed most.
One of the biggest mistakes I see people make is re-compressing a file that’s already been compressed. Every time a video is compressed, it loses data. If you start with a low-quality, heavily compressed file and then compress it again, you're just making the artifacts worse and ending up with a mushy, unprofessional video.
Always, always start with the highest-quality source file you have. It’s the only way to get the best possible results.
Your Video Compression Questions Answered
Even after you've got the tools and know the basic steps, some very specific questions always seem to come up. When you're in the middle of a project and need to shrink a video file, you need direct, practical answers.
Let's dig into some of the most common questions I hear.
Can I Make a Video Smaller Without Losing Quality?
This is the million-dollar question. The short, technical answer is no, but the practical answer is absolutely yes.
True lossless compression does exist, but the file size reduction is usually tiny. The heavy lifting is done by lossy compression, which means some data gets thrown out for good.
But here’s the secret: that data can be removed so smartly that the human eye can't even tell it's gone. Using a modern codec like H.264 with the right bitrate lets you slash file sizes without anyone noticing a drop in quality. For almost anything you share online, the difference is completely invisible.
How Do I Compress a Huge Video File for Email?
We've all been there. You have a massive 4K video and an email client with a strict 25 MB attachment limit. It’s just not going to work.
Here’s your game plan:
Drop the Resolution: This is your first and most effective move. For email, 720p is more than enough.
Be Aggressive with Bitrate: Fire up a tool like HandBrake and don't be shy. Choose a preset like "Fast 720p" or even "Very Fast 480p" to bring the bitrate way down.
Zip It Up: Sometimes, zipping the final video file can squeeze out a few extra megabytes. It's a quick last step worth trying.
A Better Alternative: Honestly, the best solution is to skip attachments altogether. Upload your video to Google Drive, Dropbox, or a video platform, and just paste the share link into your email. It bypasses all size limits and gives your recipient a much better experience.
What Is the Best Format for Compressing a Video?
For almost every situation you'll encounter, the answer is simple: MP4 (H.264).
MP4 is the container format. It’s the universal standard that works on every modern browser, device, and social media platform.
H.264 is the codec inside. It hits that perfect sweet spot between high-quality video and small file sizes.
Newer codecs like H.265 (HEVC) or AV1 are technically more efficient, but their support is still not universal. If you want to guarantee your video plays everywhere without a hitch, sticking with the MP4/H.264 combo is the safest, most reliable bet.
Transforming your existing articles and podcasts into engaging videos has never been easier. With Aeon, you can automate the entire video creation process, turning your text, audio, or existing video content into professionally crafted, brand-aligned videos at scale. Drive more traffic, boost engagement, and grow your revenue without the heavy lifting. Discover what Aeon can do for your publishing strategy.
Share the article
Contributor
Dan Benyamin
Dan served as VP of Data Products at Condé Nast, following their acquisition of CitizenNet, a social media marketing platform he founded.


.jpg)