If you want to shrink a video file without turning it into a pixelated mess, you've got to get a handle on four things: the video codec, bitrate, resolution, and frame rate. It’s a bit of a balancing act, but learning to tweak these settings is how you get those crisp, clean videos that load instantly and don't cost a fortune to store.
Why Managing Video File Size Is a Critical Skill

Let's be real—massive video files can bring your entire workflow to a screeching halt. They cripple website load times, eat up your marketing budget, and create a frustrating experience for your audience. In a world where viewers expect everything now, an oversized video is a major roadblock.
This isn't just a technical headache; it's a business problem with real-world consequences.
Think about it. Soaring hosting and bandwidth costs chew directly into your profits. A slow-loading video on a landing page kills the user experience, sending bounce rates through the roof and tanking conversions. For content teams, gigantic files create production bottlenecks, slowing down everything from uploads and edits to final distribution.
Mastering video compression is no longer a 'nice-to-have'—it's an essential skill in any modern content workflow. Get it right, and your videos load faster, cost less to store, and reach more people, no matter their connection speed.
This problem is only getting bigger. The average size of a file package has jumped by 20% in the last three years alone. We're seeing download sizes bloat from around 20.8 GB to 25 GB. That trend puts a huge spotlight on the need for smart compression just to keep things manageable.
The Tangible Business Benefits of Optimization
Wrestling your video file sizes into shape isn't just about saving hard drive space. It's about boosting performance and hitting your business goals. Smaller, optimized files deliver a cascade of benefits that impact both your audience and your bottom line.
Here’s what you stand to gain:
- Improved User Experience: Quick-loading videos keep people watching. When playback is fast and seamless, you reduce frustration and encourage viewers to stick around, which is great for metrics like watch time and completion rates.
- Lower Operational Costs: Every gigabyte of data you store and transfer has a price tag. By shrinking your video files, you can seriously cut down on cloud storage fees and content delivery network (CDN) bandwidth charges. That’s budget you can put back into marketing.
- Faster SEO Performance: Website speed is a confirmed ranking factor for Google. Beyond just the video player, optimized files contribute to better overall site performance. It's a piece of the puzzle, just like understanding how your hosting service affects website speed.
- Wider Audience Reach: Not everyone is on a blazing-fast connection. Smaller video files make your content accessible to users on slower mobile networks or in regions with spotty internet, ensuring your message can land without endless buffering.
Key Factors Affecting Video File Size at a Glance
To wrap your head around video compression, it helps to see the main levers you can pull and how much impact each one has. Some changes will shave off a few kilobytes, while others can slash the file size in half.
Here’s a quick breakdown of the core components:
As you can see, your biggest wins will come from focusing on bitrate, resolution, and your choice of codec. The other factors are more like fine-tuning adjustments to squeeze out that last bit of efficiency.
Pick the Right Codec and Container for Your Needs
Think of your video file like a package you're shipping. The codec is the compression method—how tightly and cleverly you pack the contents. The container is the actual box, the file format like .MP4 or .MOV that holds it all together.
Getting this combo right from the start is the single biggest move you can make to shrink your video's file size. It’s the foundation. Everything else, from bitrate to resolution, builds on this decision.
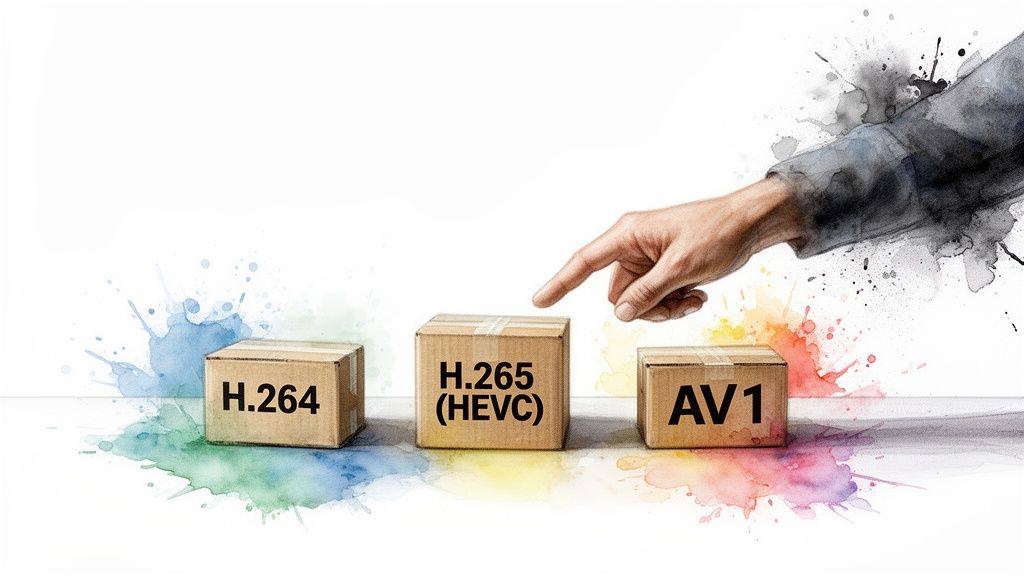
H.264 vs. H.265 vs. AV1: What's the Difference?
When you export a video, you're choosing an algorithm to shrink it down. This algorithm, the codec (short for coder-decoder), is what dictates the final file size more than anything else. Here’s the breakdown of the usual suspects.
H.264 (AVC - Advanced Video Coding) For years, H.264 has been the undisputed champ, and for good reason: universal compatibility. Pretty much every device, browser, and platform on the planet can play an H.264 video without breaking a sweat. It strikes a fantastic balance between quality and file size, making it the safest bet for almost any web content.
H.265 (HEVC - High Efficiency Video Coding) The name says it all. H.265 (or HEVC) is all about efficiency. As the successor to H.264, it can deliver the exact same visual quality at a much smaller file size. We're talking a 20-50% reduction in bitrate for the same quality level. For instance, a 4K stream that needs 32 Mbps with H.264 can get by with just 15 Mbps using H.265.
This makes HEVC a lifesaver for high-resolution video like 4K, where file sizes get out of hand fast. The catch? It takes more horsepower to encode and isn't quite as universally supported as its older brother, though adoption is growing quickly.
AV1 (AOMedia Video 1) AV1 is the new kid on the block, an open-source, royalty-free codec backed by tech giants like Google, Netflix, and Amazon. It promises up to 30% better compression than even H.265. While that’s incredible for streaming, the encoding process is extremely demanding on your hardware. For now, it's mostly in the hands of major streaming platforms, but keep an eye on it for the future.
Key Takeaway: For maximum compatibility, stick with H.264. If your top priority is the smallest possible file size for modern devices and you don't mind a slightly longer export, make the switch to H.265 (HEVC).
Containers: Less Important, But Still a Choice to Make
While the codec is doing all the heavy lifting, the container format is what bundles the compressed video, audio, and metadata into a single playable file. These are the file extensions you see every day.
- .MP4: This is the de facto standard for the web. It's compatible with everything and is the perfect partner for H.264 and H.265 codecs. If you're posting to social media, a website, or just about anywhere online, MP4 is your answer.
- .MOV: Developed by Apple, this is a high-quality container common in professional video editing, especially if you're in the Apple ecosystem. It's great for production, but you should almost always export to MP4 for final delivery.
- .MKV (Matroska): A very flexible, open-source container that can hold tons of different audio and subtitle tracks. It's great for archiving media but doesn't have the broad native support needed for web browsers and mobile devices.
The container itself has almost no impact on the final file size. The decision is really about making sure your codec and container pairing will actually play on your target platform. If you want to get into the nitty-gritty of how these pieces work together, our guide on what is video encoding has you covered.
Practical Recommendations for Your Content
So, what should you actually use? It all comes down to where your video is going and who’s watching it.
- For a Website or Blog: Go with H.264 in an MP4 container. This guarantees your video will play for every single visitor, no matter their device or browser.
- For YouTube or Vimeo: These platforms are encoding pros. You can upload a high-quality H.265 (HEVC) file in an MP4 container. This will make your upload faster and save you bandwidth, and they'll handle creating all the different versions for viewers.
- For Instagram or TikTok: These are mobile-first platforms. Stick with H.264 in an MP4 container to ensure perfect playback on every kind of smartphone.
- For Archiving Master Files: If you're just saving a high-quality master copy for future use, a professional format like Apple ProRes within a .MOV container is the way to go. Just remember to never use this for web delivery—the file sizes are gigantic.
Fine-Tuning Your Video: Bitrate, Resolution, and Frame Rate

If codecs and containers are the foundation, think of bitrate, resolution, and frame rate as the blueprints for your video file. This is where you really get your hands dirty, making the critical trade-offs between jaw-dropping visuals and a sensible file size. Getting these three settings right gives you precise control over your final output.
Bitrate is essentially the data budget for each second of your video. Measured in megabits per second (Mbps), it's the single most impactful setting you can tweak. A higher bitrate crams more data into every second, giving you a crisp, detailed image—but a massive file to go with it.
Lowering the bitrate is the fastest way to shrink a video, but it's a balancing act. Go too low, and you'll start to see those ugly, blocky artifacts that scream "low quality."
Always Choose Variable Bitrate (When You Can)
When exporting, you'll usually see two main options: Constant Bitrate (CBR) and Variable Bitrate (VBR).
CBR is a blunt instrument. It assigns the exact same amount of data to every single second, whether it's a fast-paced action sequence or a static shot of a talking head. This is incredibly inefficient.
This is where Variable Bitrate (VBR) comes in. It's the smarter, more sophisticated approach. VBR intelligently analyzes your video and allocates more data to complex, high-motion scenes while dialing it back for simpler, static moments. For almost any kind of marketing or web video, VBR is your best friend for getting the best possible quality out of the smallest possible file.
Does It Really Need to Be 4K? Dialing in Your Resolution
Resolution is just the number of pixels that make up each frame of your video. While shooting in 4K (3840 x 2160 pixels) is fantastic for capturing detail, delivering that same resolution is often total overkill.
One of the easiest wins in file size reduction is to simply lower the resolution. You have to ask yourself: where will people actually be watching this?
- Social Feeds & Mobile: On Instagram or TikTok, nearly everyone is watching on a small phone screen. Exporting at 1080p (1920 x 1080) is more than enough to look sharp.
- Website Videos: A video embedded in a blog post rarely takes up the whole screen. A 1080p or even a 720p (1280 x 720) export will look great and significantly improve your page load times.
- YouTube & Desktops: For platforms where viewers might go full-screen on a larger monitor, 1080p is the gold standard. Reserve 4K for your cinematic hero content where every pixel counts.
Dropping the resolution from 4K to 1080p reduces the total pixel count by 75%, which has a massive knock-on effect on file size. If you want to get deeper into the weeds, check out our full guide on what is video resolution.
Frame Rate: Finding the Sweet Spot
Frame rate, measured in frames per second (fps), determines how many individual images flash on the screen every second. High frame rates like 60 fps create that ultra-smooth, fluid motion you see in sports broadcasts or video game footage.
But for most content marketing videos, that's not necessary. In fact, it can even feel a bit unnatural. The cinematic, film-like standard is 24 fps, while most digital video lives comfortably at 30 fps.
Dropping your frame rate from 60 fps to 30 fps can literally cut the required data in half. For things like interviews, tutorials, or presentations, most viewers won't even notice the difference.
With smart adjustments, it's not uncommon to see 80-90% reductions in file size with almost no perceptible loss in quality. We've seen projects go from 132.1 MB down to just 18.4 MB (an 86% reduction) just by dialing in these settings. Another went from 415.1 MB to 45.6 MB—an 89% reduction!
Recommended Export Settings for Popular Platforms
Every platform has its own secret sauce for compression. They’re going to re-compress your video no matter what you upload, so your goal is to give their algorithm the best possible file to work with. Sending a file that’s close to their preferred specs—like when you're optimizing video for Instagram Reels—helps minimize quality loss.
To save you some time, here's a quick reference guide our team uses for exporting content for major platforms.
By thoughtfully tailoring these three key settings to your content and its final destination, you can slash file sizes without sacrificing the quality you worked so hard to create.
Practical Tools and Workflows for Video Compression
Knowing the theory behind codecs and bitrates is one thing, but you need the right tools to actually put it to work. The good news? You don't have to shell out for an expensive software suite to get professional results. Two of the most powerful and respected applications for the job are completely free.
For most folks, HandBrake is the perfect place to start. It’s a fantastic open-source video transcoder with a user-friendly interface that takes the pain out of re-encoding video.
If you need more power, want to automate things, or just prefer working in the command line, FFmpeg is the undisputed industry standard. It's the engine silently powering countless video apps, giving you absolute control over every possible parameter.
Getting Started with HandBrake
HandBrake hits that sweet spot between simplicity and power. It’s loaded with presets that help you get a great result without needing a degree in video engineering, but it also lets you get under the hood and tweak every setting imaginable.
Here's a quick look at a typical workflow for shrinking a video file:
- Open Your Source Video: Just drag and drop your large video file into HandBrake. It'll scan the file and show you all of its current properties.
- Choose a Preset: The "Presets" panel is your best friend here. For most things you'd put on the web, starting with "Fast 1080p30" or "Vimeo YouTube HQ 1080p60" is a solid move. These presets automatically dial in a bunch of settings for a good balance of quality and size.
- Select MP4 Format: Head over to the "Summary" tab and make sure the Format is set to MP4. This container offers the best compatibility across pretty much every device and platform out there.
Once you’ve got a preset selected, the real magic is in the "Video" tab. This is your command center for fine-tuning the compression to get exactly what you need.
The Power of the CRF Slider
Inside the "Video" tab, you'll find the all-important Constant Rate Factor (CRF) slider. This is, by far, the most intuitive way to manage the trade-off between visual quality and the final file size.
Instead of forcing you to guess a specific bitrate, the CRF setting tells the encoder to aim for a consistent perceptual quality level. Lower CRF numbers mean higher quality and bigger files; higher numbers mean more compression and smaller files.
A good rule of thumb for 1080p web video is a CRF value between 20 and 23. For 4K content, you can often push this a bit higher, into the 22 to 28 range, since the extra resolution does a great job of hiding minor compression artifacts.
The best way to find your sweet spot is to experiment. Take a one-minute clip from your video and encode it at a few different CRF values—say, 20, 22, and 24. Compare the output files. You’ll quickly discover the point where the file size is dramatically smaller without a noticeable drop in quality.
For a deeper dive into the mechanics of this, our guide on what is video transcoding and how does it work breaks down the technical details.
Command-Line Compression with FFmpeg
When you need to automate compression for a large batch of files or access more advanced options, FFmpeg is the ultimate tool. It runs from the command line, which can look a little intimidating at first, but its power is unmatched. Once you learn a few basic commands, you can process hundreds of videos with a single script.
This is a lifesaver for content teams that have to process huge volumes of user-generated content or prep an entire video library for a new platform.
Here are a few practical FFmpeg examples to get you started:
-
Basic H.264 Compression: This command takes your
input.movfile and re-encodes it using the very common H.264 codec, aiming for a quality level (CRF) of 23. ffmpeg -i input.mov -c:v libx264 -crf 23 output.mp4 -
Maximum Efficiency with H.265 (HEVC): To get even smaller files with the same quality, you can use the newer H.265 codec. The command is nearly identical, just using the
libx265encoder with a CRF of 28 (a common value for H.265). ffmpeg -i input.mov -c:v libx265 -crf 28 output.mp4 -
Removing an Extra Audio Track: Sometimes a video has multiple audio languages, which adds unnecessary weight. This command copies the video stream exactly as it is (no re-encoding) but keeps only the first audio track, stripping out the rest. ffmpeg -i input.mp4 -map 0:v -map 0:a:0 -c copy output.mp4
Learning to use tools like HandBrake and FFmpeg gives you total control over your video files, turning what seems like a complex technical challenge into a simple, routine part of your content workflow.
Don't Forget Audio (And Other Pro-Level Tweaks)

We spend so much time obsessing over pixels and video bitrates that it's easy to forget the other major component of a video file: the audio track. A bloated audio stream is often the silent accomplice in an oversized file, and optimizing it is one of the easiest wins you can get.
Many cameras and editing programs default to a high audio bitrate—sometimes as high as 320 kbps. That’s fantastic for a high-fidelity music track, but it's massive overkill for a tutorial or a talking-head video.
With a few quick adjustments, you can shave a surprising number of megabytes off your final export without anyone noticing the difference.
Dialing in Your Audio Compression
The game here is to find the sweet spot between clarity and file size. For that, the undisputed champion is AAC (Advanced Audio Coding). It delivers excellent quality at low bitrates, which is why it's the standard for MP4s and pretty much every streaming platform out there.
When you export, you'll have control over the audio bitrate. Here’s my go-to guide for choosing the right setting:
- 128 kbps: This is the gold standard for most web videos. It provides crisp stereo sound that's practically indistinguishable from higher rates for dialogue-heavy content.
- 96 kbps: If your video is mostly spoken word—a podcast, a voiceover, a simple tutorial—you can easily drop to 96 kbps with no perceptible loss in quality. It's an easy way to save a bit more space.
- 64 kbps (Mono): For anything where stereo isn't necessary (like a single-person interview), switching to a mono track at 64 kbps literally cuts the audio data in half again.
My rule of thumb? I start at 128 kbps (Stereo) for almost everything. For a typical 10-minute 1080p video, simply switching from an uncompressed default to AAC at 128 kbps can save over 100 MB. It's one of the easiest and most impactful changes you can make.
Ditch Unnecessary Tracks and Metadata
Beyond compression, your video file can carry around a lot of extra baggage. Cleaning this up is like decluttering before sending it out into the world.
A common culprit is multiple audio tracks. It’s not unusual for professional projects to have separate tracks for different languages, director’s commentary, or a music-only mix. Unless your audience specifically needs them, they're just dead weight.
Check your export settings in your video editor and make sure you’re only including the primary audio mix.
Files can also contain heaps of metadata—camera settings, GPS data, editor notes, and so on. While useful during production, this info is useless to the viewer and can be stripped out with tools like FFmpeg to trim the file size down even further.
The Advanced Tweak: Chroma Subsampling
If you really want to get into the weeds of video compression, you need to know about chroma subsampling. This is a technique that cleverly reduces the amount of color information in a way the human eye barely notices. Our eyes are far more sensitive to brightness (luma) than to color (chroma), and this trick exploits that.
You'll see it expressed as a ratio, like 4:4:4, 4:2:2, or 4:2:0.
- 4:4:4: This is full, uncompressed color. Total overkill for web video.
- 4:2:0: This has only a quarter of the original color information.
Believe it or not, the vast majority of video you watch online—from YouTube to Netflix—uses 4:2:0 subsampling. The file size reduction is massive, and the impact on perceived quality is virtually zero for the average viewer.
Most export presets in tools like HandBrake or Adobe Media Encoder already default to 4:2:0, but it’s a critical setting to be aware of. Double-checking that your export is set to 4:2:0 is a hallmark of a professional compression workflow.
Your Top Video Compression Questions, Answered
Jumping into video compression can feel like opening a can of worms. There are a lot of terms and settings to get your head around, especially when you're just trying to shrink a video for a project. Let's walk through some of the most common questions and hurdles that trip up marketing and content teams.
What’s the Best Software to Reduce Video File Size?
For most people, the go-to free tool is HandBrake. It's the Swiss Army knife of video compression. You can use its built-in presets for a quick and easy result, or you can dive into the manual controls to tweak every last setting. It’s a genuine workhorse.
If you're comfortable with a command-line interface or need to automate compression for a massive library of videos, FFmpeg is the undisputed industry standard. For a quick, one-off job online, a tool like VEED.io can do the trick, but you'll sacrifice a lot of control. And for pros already in the Adobe ecosystem, Adobe Media Encoder is a robust choice that plays nicely with the rest of the Creative Suite.
Will Shrinking a Video Always Make It Look Worse?
Honestly, not in a way your audience is likely to notice. Modern compression is a "lossy" process, which is a technical way of saying it intelligently throws away visual and audio data that our eyes and ears can't easily perceive.
So yes, data is technically lost forever, but a well-compressed video can look virtually identical to the original, especially when it's being watched on a website or a phone. The goal is to find that sweet spot where the file size is dramatically smaller, but any visual downgrade is invisible to the naked eye.
The art of good compression isn't about avoiding quality loss entirely—it's about making that loss imperceptible to the viewer while achieving a much smaller file.
What's a Good CRF Value to Use in HandBrake?
CRF, which stands for Constant Rate Factor, is a godsend. Instead of forcing you to guess a specific bitrate, it lets you pick a quality level, and it handles the rest. Just remember: lower CRF numbers mean higher quality and bigger files.
- A fantastic starting point for standard 1080p web video is a CRF between 20 and 23.
- For 4K content, you can often push that number higher, into the 22 to 28 range, because the sheer pixel density helps hide minor compression artifacts.
My best advice? Test it. Take a short, representative clip from your video and export it at a few different CRF values. This is the only way to see what looks best for your content. A talking-head interview might look perfect at CRF 24, but a cinematic scene with fast motion and fine detail might need to be closer to CRF 20.
How Can I Make a Video Small Enough for Email?
This is a tough one. Email clients are notoriously unforgiving, often capping attachments around 25MB. Hitting that target means you have to get aggressive.
- Drop the Resolution: Don't even think about 1080p. Start with 720p (1280x720) or even 480p.
- Use the Right Codec: Stick with the universally supported H.264.
- Slash the Bitrate: You'll need to set a very low video bitrate, probably under 1,000 kbps.
- Crush the Audio: Take the audio bitrate down to 96 kbps or even 64 kbps.
Frankly, the best strategy is to sidestep the problem entirely. Don't attach the video. Instead, host it on a platform like YouTube, Vimeo, or Wistia and just share a link with an eye-catching thumbnail in your email. This guarantees a better viewing experience for your audience and saves you the headache of fighting file size limits.
At Aeon, we help publishers automate their video creation, turning articles and audio into engaging social videos in minutes. If you need to scale your video output without scaling your team, see how our platform can work for you at https://www.project-aeon.com.