You can actually turn a PowerPoint into a video in just a few minutes, right from inside the app itself. The secret is the built-in Export to Video feature. It packages up your entire presentation—timings, narrations, and all—into a neat little MP4 file ready for sharing.
Why Turning Presentations Into Videos Is a Game Changer
Let’s be honest, static slide decks often fall flat. A presentation that kills it in a live meeting rarely has the same punch when someone just sends it over as an attachment.
But when you transform that same PowerPoint into a video? It’s a whole new ballgame. You’re turning a passive document into an active, engaging experience that actually holds people’s attention and gets your message across.
This isn’t just about looking good; it's about meeting people where they are. We’re all conditioned to consume information through video, from quick clips on social media to in-depth tutorials on YouTube. A video just feels more personal and dynamic, making even complex ideas much easier to follow.
Boost Engagement and Retention
The biggest win here is the massive jump in audience engagement. People are far more likely to watch a short, narrated video from start to finish than they are to click through 20 separate slides.
Plus, this format is fantastic for information retention. The mix of visuals, audio, and motion caters to different learning styles, making your message stick.
Think about the real-world applications. A sales team can send a product demo video that prospects can watch on their own schedule. A marketing team can repurpose a webinar presentation into a lead-gen magnet for their website. The possibilities are endless.
Drive Measurable Business Results
The data backs this up, especially when it comes to the bottom line. Companies that use video in their marketing grow revenue 49% faster year-over-year than those that don't.
And it gets better. A staggering 93% of marketers say video gives them a positive return on investment, cementing it as an essential business tool. If you want to dig deeper, you can discover more insights about the impact of video on business growth.
This opens up a huge opportunity for any organization sitting on a library of old presentations. Every single slide deck is a potential video just waiting to be made.
By repurposing existing assets, you're not just saving time and resources; you're unlocking the hidden value in content you've already created. It’s one of the most efficient ways to scale your content production and meet audience demand.
To really see the difference, it helps to compare the two formats side-by-side.
Static PowerPoint vs Dynamic Video Key Differences
This table breaks down how a simple format change can completely alter the impact of your content.
The takeaway is clear: converting your presentations unlocks a new level of reach and effectiveness that static files simply can't match.
Your Core Methods for Converting PowerPoint to Video
Alright, let's get into the nuts and bolts of actually turning your PowerPoint into a video. You've got two solid paths to take here, and the best one for you really depends on what you're trying to achieve.
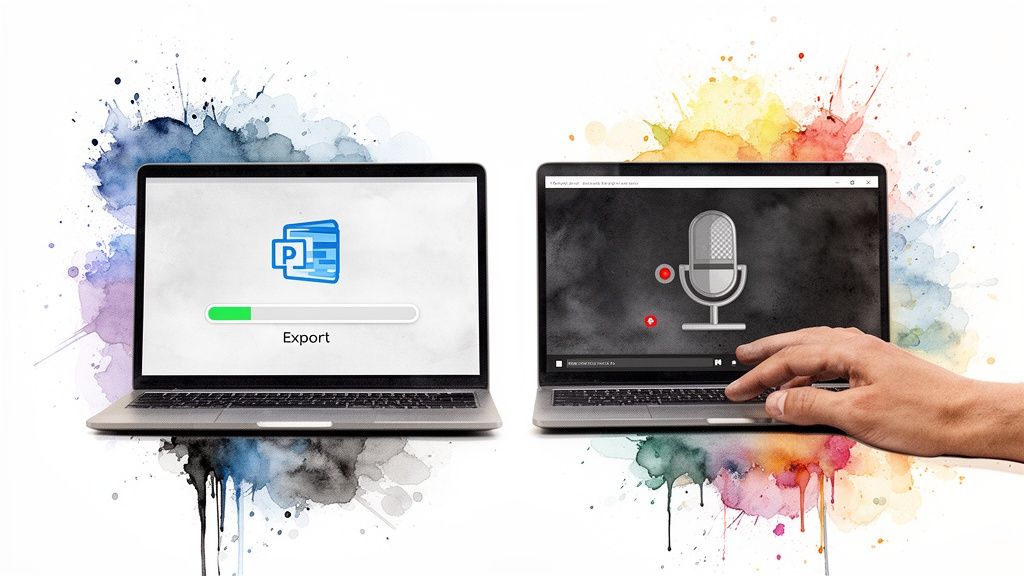
The first route is the most direct: using PowerPoint’s built-in Export to Video feature. It's fast, clean, and perfect for when you need a polished video without a lot of fuss.
The second option is to use screen recording software. This gives you way more flexibility and a hands-on feel, letting you create a more personal, guided walkthrough. Let's break down when and how to use each one.
Using the Built-In Export Feature
This is your go-to when you need a reliable conversion, fast. The process couldn't be more straightforward. Just head to File > Export > Create a Video. Once you're there, you'll see a few critical choices that will shape your final video.
First up, video quality. My standard recommendation is almost always Full HD (1080p). It strikes the perfect balance between crisp, professional clarity and a manageable file size. If your slides are loaded with intricate diagrams or high-res photography, bumping it up to Ultra HD (4K) can make a noticeable difference.
Next, you'll deal with timings. You can either use timings and narrations you’ve already recorded or just set a default time for each slide to be on screen.
Recording your narration directly in PowerPoint is a game-changer for things like self-guided training modules or presentations you need to send out for people to watch on their own time. Head to the "Slide Show" tab and hit "Record Slide Show". This lets you capture not just your voiceover but also any laser pointer movements you make, slide by slide.
Pro Tip: Before you record the real thing, always do a practice run with the "Rehearse Timings" feature. This is your chance to nail the pacing and make sure your commentary lines up perfectly with your animations. Trust me, it’s the key to avoiding those awkward pauses or sounding rushed.
Once your quality and timings are locked in, just click "Create Video." PowerPoint does all the heavy lifting and bundles everything into a nice, neat MP4 file.
The Screen Recording Method
If you're aiming for a more conversational, less "corporate" vibe, screen recording is the way to go. This approach is fantastic when you want to guide your viewer with your mouse, jump over to a web browser, or even demo a piece of software mid-presentation.
Tools like OBS Studio (an amazing free option), Camtasia, or even QuickTime on a Mac let you capture your screen while you present. You just fire up your presentation in "Slide Show" mode, hit record, and start talking through your slides.
This method comes with some serious perks:
- Total Flexibility: You're not stuck with pre-set slide timings. Feel free to pause on a complex chart, elaborate on a key point, or interact with your content as you see fit.
- A Personal Touch: Including a small webcam feed of yourself in the corner can make a huge difference. It immediately builds a stronger connection and makes the video feel more like a one-on-one chat.
- Easy Error Correction: Did you stumble over a word or miss a point? No big deal. With screen recording, you can simply pause, go back, or snip out the mistake later in a basic video editor.
The only real downside is that it takes a bit more setup and you'll need a quiet place to record. But the payoff is a more authentic and engaging video that feels less like a static slideshow and more like a personal tour. It all comes down to matching the tool to the task.
How to Optimize Your Video for Different Platforms
Alright, you've turned your presentation into a video. That's a huge win, but the work isn't quite done. The real goal is getting eyeballs on it, and a "post-it-everywhere" strategy just doesn't cut it anymore. To get real traction, you have to meet your audience where they are and speak their language—visually.
The demand for video is absolutely massive. A staggering 84% of consumers say they want to see more videos from brands they follow. What's more, 89% of people admit that video quality directly influences their trust in a brand. This makes platform-specific optimization less of a "nice-to-have" and more of a necessity.
Think about it: that polished, widescreen video you exported from PowerPoint will look fantastic on YouTube. But drop that same file into a vertical Instagram Story feed, and it immediately looks clunky and out of place, which means people will just scroll right past it.
Mastering Aspect Ratios for Social Feeds
The single most important tweak you can make is matching your video's aspect ratio to the platform's native format. Each social feed has its own visual rhythm, and fitting in is the first step to standing out.
-
16:9 (Widescreen): This is your classic horizontal layout, the gold standard for YouTube. It's also the go-to for videos embedded on your website or blog. This is home base for your full-length, detailed content.
-
1:1 (Square): The square format is a workhorse for the feeds on LinkedIn and Instagram. It grabs more vertical real estate on a phone screen compared to widescreen, making your content more prominent as users are scrolling.
-
9:16 (Vertical): This is the immersive, full-screen experience of Instagram Stories, Reels, and TikTok. It’s built for mobile and demands a totally different creative mindset—think fast cuts, bold text, and content that gets to the point immediately.
For a complete breakdown of the specs for every channel, you'll want to check out our guide on social media video sizes.
Tailoring Content for Each Platform
Beyond the technical dimensions, the content itself needs to be reshaped. A 15-minute, in-depth presentation might be a tough sell on LinkedIn, but a 60-second highlight reel that pulls out the most surprising data point could go viral.
The real trick is to deconstruct your original PowerPoint. Don't think of it as one video; think of it as a goldmine of content. Pull out a single compelling slide, one killer stat, or a powerful quote and turn that into its own short, snappy video. One presentation can easily become five or six unique social media assets.
Here’s how this looks in practice:
- For LinkedIn: Isolate a key statistic from your presentation. Create a clean, 45-second video with large, easy-to-read text overlays. Most people on LinkedIn watch with the sound off, so make it visually understandable.
- For Instagram Stories: Grab a slide that asks a provocative question. Animate it quickly and add an interactive poll or quiz sticker right in the app to drive immediate engagement. The goal here is interaction, not just passive viewing.
- For YouTube: This is where the original, full-length narrated presentation belongs. It becomes your cornerstone piece of content—the comprehensive resource that all your shorter social clips can point back to, driving traffic from every platform to your main channel.
Giving Your Video a Professional Polish
Getting your PowerPoint into a video format is a solid first step, but the real magic happens in post-production. This is where you transform a simple recorded slideshow into a polished, professional piece of media that hooks viewers from the first frame.
One of the easiest wins? A subtle background music track. The trick is to pick something instrumental that fits the vibe—upbeat and motivating for a sales deck, or maybe something calm and focused for a training session. Just be sure to keep the volume low enough that it supports your narration instead of competing with it.
Another quick but effective touch is adding brand elements. A small, semi-transparent logo tucked into a corner constantly reinforces your brand identity. You can also bookend your video with a custom intro and outro slide, which is a great place to put your branding, contact info, or a clear call to action.
Go Beyond PowerPoint’s Default Animations
Let’s be honest, some of PowerPoint’s built-in animations can look a bit dated. For a more modern and fluid feel, you want to use transitions that actually serve a purpose. This is where the Morph transition becomes your best friend.
Morph works by seamlessly animating an object's position and size between two slides. Simply duplicate a slide, then move or resize an object on the new one, and Morph will handle the rest. It's incredibly powerful for things like:
- Zooming in on a critical part of a chart or diagram.
- Creating a smooth flow between related concepts without a jarring cut.
- Animating infographics to reveal data points one by one.
This one technique can give your video that high-end, custom-animated look, all without ever leaving PowerPoint.
The goal is always visual storytelling. Every single transition and animation should guide the viewer's eye and clarify the narrative, not just add pointless movement. Think of it as turning static, dense slides into a story that unfolds naturally.
Adding Dynamic Overlays and Better Sound
To really elevate your video, think about adding lower-third titles to introduce speakers or highlight key topics. These simple text overlays are a staple in broadcast-quality content for a reason—they add a layer of professionalism that’s hard to ignore.
Audio quality is another non-negotiable. If you've recorded narration, listen back to make sure the levels are consistent. A sudden jump or drop in volume is one of the fastest ways to make a viewer click away. If you're struggling with this, our guide on how to sync audio and video perfectly has some great tips to avoid common issues.
It's a great time to be creating video. Cloud-based platforms now make up 62% of the video creation market, making professional-grade tools more accessible than ever. In fact, 50% of small businesses are now using AI-powered tools to produce content that once required a full studio. You can read more about the growth of the video presentation software market and see just how much the landscape is changing for creators.
Scaling Your Workflow With Automation And AI
Let's be real. Manually converting a single PowerPoint into a video is tedious enough. But trying to do that for your entire content calendar? It's a non-starter for any team that's already stretched thin. The whole process is just a time sink, forcing you to juggle different tools for narration, editing, and getting the formatting right for each social platform.
This is where automation and AI really start to shine, completely changing the game.
Forget about painful, one-off projects. Think about creating a smooth, efficient content production engine. The goal is to get the manual grunt work out of video creation so you can focus on strategy, not on repetitive, mind-numbing edits. This shift is what allows teams to spin an entire multi-channel video campaign out of a single presentation in minutes, not days.
The Power Of An Automated Engine
The whole idea is wonderfully simple: you upload your presentation, and let the smart tools handle the heavy lifting. Platforms like Aeon are built specifically for this. You can drop in a slide deck and let AI generate a studio-quality voice-over directly from your speaker notes, pull in compelling stock visuals to make your slides pop, and even apply cinematic transitions.
This isn't just about going faster. It's about raising the quality and consistency across everything you produce. Automation makes sure every single video hits your brand guidelines—from logos and colors all the way down to the specific tone of the narration.
- AI Narration: Get lifelike voice-overs in dozens of languages without ever needing a microphone.
- Visual Enhancement: Let the AI suggest relevant B-roll or imagery to bring static, text-heavy slides to life.
- Smart Editing: Automatically handle the cuts, transitions, and captions to create a polished video that's ready to publish.
If you want to see just how far this technology has come, it's worth exploring an AI Video Generator. These tools are a great showcase of what's possible when it comes to producing high-quality content at an incredible scale.
From A Single Video To A Full Campaign
The real magic of automation kicks in when you stop thinking about one video and start thinking about campaigns. An AI-powered workflow can take your initial PowerPoint and instantly slice and dice it for every single platform you're on.
Imagine you upload your standard 16:9 presentation. The system can then automatically spit out:
- A square (1:1) version perfectly optimized for your LinkedIn feed, complete with burned-in captions.
- A vertical (9:16) highlight reel for Instagram Stories that focuses only on your most powerful points.
- A handful of short, animated GIF-style clips you can drop into your next email newsletter.
This is how you level up from just being a content creator to becoming a content strategist. The system takes care of the production, freeing you up to think about the bigger picture: distribution, engagement, and actual results. It’s like having a full creative studio on standby, ready to bring your ideas to life instantly.
This approach finally makes it practical to test different messages and formats across all your channels without your workload exploding. You can build an automated content pipeline with AI video creation and start producing more, faster. Adopting these tools is how you finally scale your video marketing without scaling your team or your budget.
Even with the best tools, you’re bound to hit a few snags when turning a PowerPoint into a video. It just comes with the territory. Answering these common questions upfront is the key to building a workflow that actually works without constant headaches.
Let's clear up some of the most frequent hurdles so you can move forward with confidence.
What’s the Best Video Format When I Export from PowerPoint?
For almost every single use case, your best bet is MP4 with the H.264 codec. It's the gold standard for a reason.
This format hits the sweet spot between high quality and a manageable file size. It’s universally compatible, so you know it will play perfectly whether you’re uploading it to YouTube, sharing it on LinkedIn, or even sending it as an email attachment.
When PowerPoint gives you the option, always choose Full HD (1080p) as your minimum quality. If your slides have a lot of fine detail—think intricate charts, small text, or high-res photos—don't hesitate to bump it up to Ultra HD (4K). This ensures every last detail stays sharp. You can pretty much ignore older formats like WMV unless you're dealing with a very specific legacy system that demands it.
My Video File Is Huge! How Do I Shrink It Without Ruining the Quality?
Massive video files are a pain, especially when you need to upload them to the web. The first move is actually preventative—before you even export, take a look at the images and video clips inside your presentation. If they're unnecessarily large, optimize them first.
Once you have your exported video, a good compression tool can feel like magic. I often recommend HandBrake, which is a fantastic free option. Just loading a preset like "Fast 1080p30" can work wonders. The real trick is to slightly lower the video's bitrate, not its resolution. It’s a simple tweak that can slash the file size while keeping the picture looking crisp.
A smaller file size isn't just about faster uploads. It directly translates to a better viewing experience for your audience—less buffering, higher completion rates—especially for people on slower connections or mobile devices.
Help! My Embedded Audio or Video Isn’t Playing.
Ah, the classic compatibility problem. This trips up more people than you’d think. The most reliable fix is to get ahead of the issue by making sure all your media files are in a standard format, like MP3 for audio and MP4 for video, before you ever drop them into your slides.
If you’ve done that and you're still having trouble after exporting, the screen recording method is your best friend. Just play your presentation in "Slide Show" mode while using a screen recorder to capture both your screen and the system audio. This approach records everything exactly as you see and hear it, completely bypassing any of PowerPoint's internal export quirks or codec conflicts.
How Can I Make My PowerPoint Video Actually Engaging?
Let's be honest: a deck of static slides with a flat voiceover is a surefire way to lose your audience. Engagement is all about creating a dynamic experience.
Here are a few things that have a huge impact:
- Vary Your Voice: If you're recording narration, mix up your tone, speed, and energy. A conversational, natural delivery will always connect better than a robotic script-read.
- Become a 'Morph' Master: Ditch the cheesy default animations. PowerPoint's 'Morph' transition is incredibly powerful for creating smooth, professional-looking animations that can highlight data points or create a seamless flow between ideas.
- Break Up the Monotony: Don't let a single slide hang on screen for too long. Punctuate your presentation with short video clips, animated text, or even a well-placed GIF to illustrate a point and reset your viewer's attention.
- Add a Finishing Touch: After exporting the video, take five extra minutes in a simple video editor to add a subtle background music track. It’s a small detail that can completely elevate the mood and professionalism of the final product.
Ready to skip the manual work and scale your video production? With Aeon, you can transform presentations into multi-platform video campaigns automatically. Generate AI voiceovers, add cinematic transitions, and get perfectly formatted videos for every social channel in minutes. Start your $5 trial with Aeon today.