


In This Article
Subscribe to our newsletter
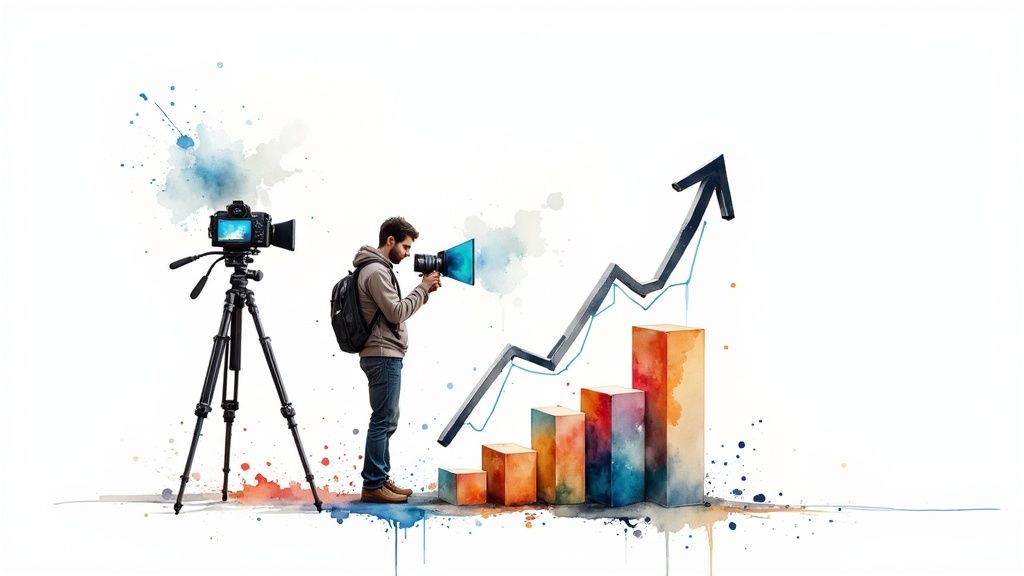
Elevate Your Videos With These 8 Expert Tips
Creating videos that truly captivate viewers is essential in today's content-rich world. Video has become a primary communication tool, making strong video editing skills crucial for various teams, including publishers, media companies, content creators, and marketing professionals. While the technology has drastically changed from linear film editing to modern digital suites, the core principles of effective editing remain consistent. Understanding these principles and using them strategically is key to transforming raw footage into compelling narratives.
What truly makes a video impactful? It's the combination of technical skill and creative vision. A well-edited video can evoke emotions, build suspense, deliver information clearly, and ultimately, drive audience engagement. This involves understanding how various elements – transitions, visual effects, sound design, and pacing – work together to create a cohesive and engaging story. The evolution of these techniques, from classic montage to modern motion graphics, continues to push the boundaries of visual storytelling.
This article provides 8 expert video editing tips, covering techniques used by industry professionals. These tips will help you enhance your storytelling, create a more immersive viewing experience, and improve the overall quality of your video content. Prepare to learn the secrets to crafting videos that resonate with your audience and achieve significant results.
Mastering the Art of Transitions
Transitions are much more than just cuts between clips. They guide the viewer's eye and create a specific flow and feel.
- Hard cuts: Create a sharp, immediate change, often used for action sequences or to emphasize a point.
- Dissolves: Gradually blend one clip into another, suggesting a passage of time or a change in location.
- Fades: Transition to or from black, typically signifying the beginning or end of a scene.
Experiment with different transitions to find what best suits the mood and tone of your video.
Enhancing Visuals With Effects
Visual effects can add depth and impact to your videos, but use them sparingly and purposefully.
- Color correction: Adjust brightness, contrast, and saturation to achieve a consistent look and enhance the overall visual appeal. You might use software like DaVinci Resolve for this.
- Filters: Apply stylized effects to create a specific mood or aesthetic.
- Motion graphics: Add animated text, logos, and other elements to enhance engagement and convey information visually.
The Power of Sound Design
Audio is just as important as visuals in creating a truly immersive experience.
- Background music: Set the tone and mood of your video.
- Sound effects: Enhance realism and create a more dynamic soundscape.
- Voiceover: Provide narration or commentary to guide the viewer and add context.
Pay close attention to audio levels and ensure a balanced mix.
Pacing and Rhythm: Keeping Viewers Engaged
The pace of your video dictates how the story unfolds and keeps viewers hooked.
- Vary shot lengths: Use a mix of long, medium, and close-up shots to create visual interest and control the flow of information.
- Use jump cuts sparingly: Jump cuts can be jarring, so use them strategically to create a specific effect.
- Match cuts: Create a seamless transition by connecting two visually similar shots.
Tell a Story, Not Just a Sequence of Clips
Even short videos should have a clear narrative structure. Introduce your subject, develop the story, and provide a satisfying conclusion. Consider using a storyboarding technique to plan your narrative visually before you begin editing.
Know Your Audience and Platform
Tailor your editing style and video length to your target audience and the platform where the video will be published. A video for social media may require a faster pace and shorter length than a video for a website or YouTube channel.
The Importance of Feedback
Get feedback on your edits from others. Fresh eyes can catch mistakes and provide valuable insights you may have missed. Be open to constructive criticism and use it to improve your skills.
Practice Makes Perfect
Video editing is a skill that improves with practice. Experiment with different techniques, software, and styles. The more you edit, the better you'll become at crafting compelling and engaging videos.
1. J-Cut and L-Cut Transitions
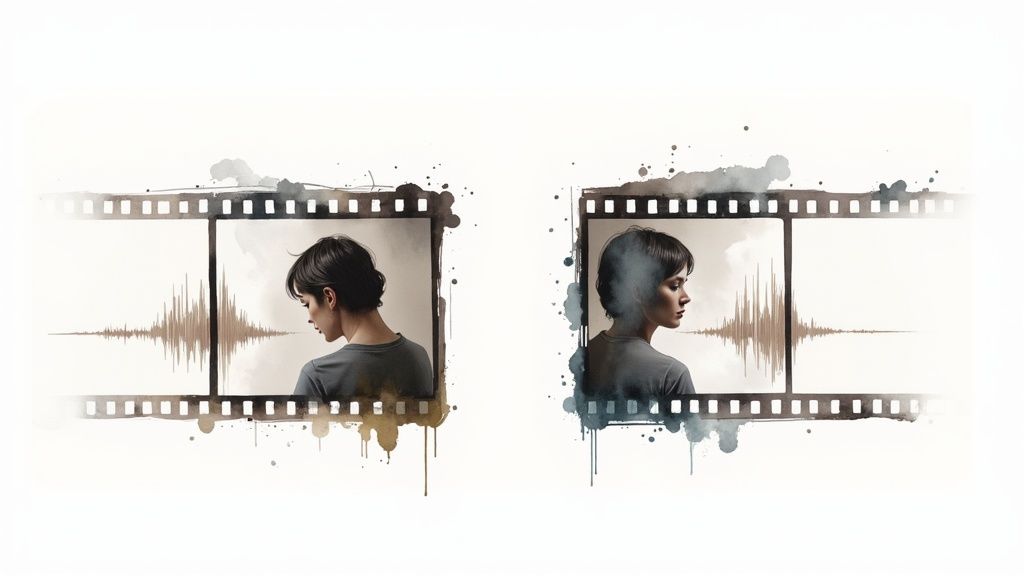
J-cuts and L-cuts are essential audio-video editing techniques. They can greatly improve the flow and engagement of your video content. These transitions get their names from how they appear on an editing timeline. A J-cut looks like a "J" because the audio precedes the video. An L-cut resembles an "L" with the audio extending past the video cut.
These cuts work by bridging scenes with overlapping audio. In a J-cut, the next scene's audio begins before the video cuts to it. Imagine a scene of a bustling city street. You hear the blare of a car horn before seeing the car. This audio cue prepares the viewer, creating a smooth transition.
An L-cut, conversely, extends the previous scene's audio after the video has changed to the next scene. Think of a character finishing a sentence. The camera moves to another character's reaction, but the first character's voice lingers briefly. This technique provides a sense of continuity.
Features and Benefits
Natural Transitions: J-cuts and L-cuts soften hard cuts, making scene changes feel more organic.
Narrative Flow: They maintain the narrative's flow by bridging scenes through overlapping sound, connecting them more effectively.
Increased Engagement: By building anticipation (J-cut) and emphasizing key moments (L-cut), these transitions hold viewer attention.
Immersive Sound: The use of off-screen sound creates a richer and more immersive experience for the viewer.
Pros and Cons of J and L Cuts
Here's a quick overview of the advantages and disadvantages of these editing techniques:
| Feature | Pros | Cons |
|---|---|---|
| Effect | Smooths hard cuts, feels more natural | Overuse can become predictable |
| Story | Improves storytelling, connects scenes | Requires precise audio editing |
| Viewer | Engages viewers, creates anticipation | Not always suitable for all types of content |
| Dialogue | Especially effective with dialogue-heavy scenes | Perfect implementation can be time-consuming |
Examples in Film and Video
The Social Network (2010): Director David Fincher uses J and L cuts in fast-paced dialogue. This creates a realistic and engaging conversational flow.
Breaking Bad: This series uses L-cuts to build suspense. The lingering audio of a threat or a crucial event carries into the next scene.
YouTube Documentaries: Many documentaries use J-cuts, with narration introducing a visual before it appears.
News Interviews: L-cuts are frequently used in interviews, with the interviewer's question continuing as the camera shifts to the interviewee's reaction.
History and Popularization
While the exact origin is unclear, these techniques date back to early film editing. Walter Murch, known for his work on films like Apocalypse Now, is often credited with refining and popularizing J and L cuts. Directors like Alfred Hitchcock and Francis Ford Coppola also used these transitions in their films. Today, YouTubers and content creators like Casey Neistat have also adopted these techniques.
Practical Tips
J-Cut Timing: Lead the audio by 2-3 seconds. Experiment to find what works best for your scene.
L-Cut Timing: Extend the audio 2-3 seconds after the video transition. Adjust timing for desired emotional impact.
Emotional Impact: Use J-cuts to build anticipation and L-cuts to emphasize reactions or dialogue.
Audio Levels: Ensure consistent audio levels between overlapping clips.
By using J-cuts and L-cuts, you can greatly improve your video editing. These techniques help create a more professional and engaging viewing experience. They are valuable tools for any video editor, allowing them to craft compelling stories and connect with viewers.
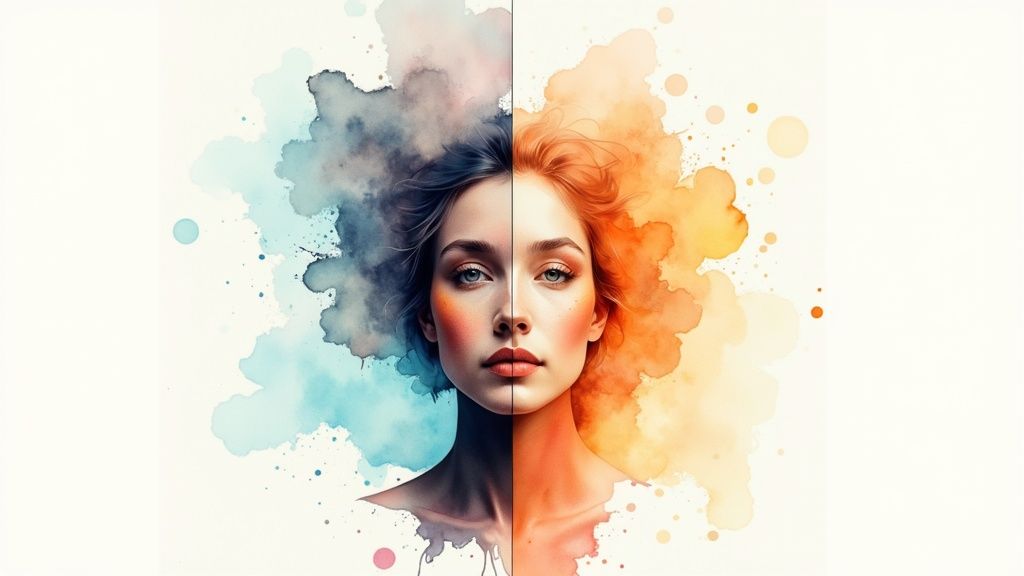
2. Color Grading and LUTs
Color grading is more than just making videos look appealing. It's a powerful tool that significantly impacts audience perception, influencing emotional responses and engagement. From setting a specific mood to reinforcing brand identity, color grading elevates video content to a professional level. Combined with the efficiency and consistency of LUTs (Look-Up Tables), it's an essential technique for any serious video creator.
Color grading involves manipulating footage colors to achieve a desired aesthetic. This ranges from subtle adjustments to correct color inconsistencies to dramatic stylizations that establish a specific visual tone. LUTs are pre-designed color transformations applied with a single click, providing a quick way to achieve consistent coloring across projects. Together, these techniques offer diverse creative possibilities:
- Transforms Visual Tone and Atmosphere: Shift the mood from warm and inviting to cool and dramatic.
- Corrects Color Inconsistencies: Ensure smooth transitions between shots, eliminating jarring differences.
- Creates Specific Moods: Evoke emotions using color psychology. Warm tones create comfort and nostalgia, while cool tones convey mystery or suspense.
- Ensures Visual Consistency: Develop a signature style that strengthens brand identity.
Pros of Color Grading and LUTs
- Instant Professional Polish: Elevates the overall production value.
- Brand Identity Reinforcement: Creates a consistent visual language.
- Time-Saving with LUTs: Quickly apply complex color grades.
- Corrects Filming Limitations: Mitigates issues with lighting and camera settings.
- Enhances Storytelling: Adds depth and subtext through visual cues.
Cons to Consider
- Overuse and Clichés: Avoid over-stylizing, which can lead to unnatural looks.
- Color Theory Knowledge: Understanding color theory is crucial for optimal results.
- Potential for Quality Degradation: Heavy grading can impact footage quality, especially in compressed formats.
- LUT Adjustments: LUTs often require tweaking for seamless integration.
- Steep Learning Curve: Mastering advanced techniques requires practice.
Real-World Examples
- Wes Anderson: Known for pastel color palettes, creating a whimsical feel.
- Hollywood Blockbusters (e.g., Transformers): Often utilize teal and orange contrast.
- Travel YouTubers: Trends like the "Orange and Teal" LUT exemplify how specific looks become genre-associated.
- Blade Runner 2049: Employs a yellow/cyan contrast, contributing to the dystopian atmosphere.
- Peter McKinnon: His YouTube videos demonstrate how a consistent color grade becomes a signature style.
Practical Tips for Implementation
- Color Correction First: Correct inconsistencies and white balance before creative grading.
- Utilize Scopes: Learn to use waveform, histogram, and vectorscope.
- Build a LUT Library: Create a collection of your favorite LUTs.
- Consider Emotional Impact: Choose colors based on the emotions you want to evoke.
- Maintain Natural Skin Tones: Ensure skin tones remain realistic.
- Non-Destructive Workflow: Use adjustment layers for flexible adjustments.
The Rise of Color Grading
Accessible software like Davinci Resolve by Blackmagic Design has democratized color grading. The influence of colorists like Jill Bogdanowicz (The Revenant, La La Land) and cinematographers like Roger Deakins has shaped the visual landscape, inspiring others to explore the power of color. Social media platforms like Instagram, with their emphasis on visual aesthetics, have further popularized color grading. Influential YouTube creators like Sam Kolder and Brandon Li have also showcased innovative techniques.
Color grading and LUTs are indispensable tools for video production. Whether you're a publisher, marketer, or content creator, understanding these techniques enhances video quality and impact, engaging your audience on a deeper level.
3. Montage Editing

Montage editing is a powerful video editing technique. It compresses time and space by combining a series of short shots. This allows filmmakers and content creators to quickly convey information or evoke emotion. It’s a valuable tool for anyone creating impactful video content.
This technique is more than just assembling clips. It uses the juxtaposition of images to create new meaning and emotional impact. A montage can show character development, the passage of time, or build tension. This can be done without relying on dialogue. For example, a montage can show months of a character’s training regimen in seconds. This effectively communicates their dedication.
Key Features and Benefits
- Compression of Time and Space: Montages condense long events into short sequences.
- Rhythmic Editing: Often paired with music, montage editing uses rhythm and pacing for impact.
- Meaning through Juxtaposition: Combining contrasting images creates meaning beyond individual shots.
- Visual Storytelling: Montages tell stories visually, without relying heavily on dialogue.
- Efficient Mood and Tone Setting: They quickly establish the mood of a scene or entire video.
Pros and Cons of Montage Editing
Understanding the advantages and disadvantages of montage editing helps creators use it effectively.
| Pros | Cons |
|---|---|
| Conveys complex information efficiently. | Can be clichéd if overused or poorly executed. |
| Engaging storytelling technique. | May oversimplify complex narratives. |
| Evokes strong emotional responses. | Requires careful planning and execution. |
| Showcases progression and transformation. | Reliant on appropriate music. |
| Ideal for short videos. | Not suitable for detailed explanations. |
Real-World Examples of Montage Editing
Montage editing is used everywhere, from classic films to social media.
- Classic Cinema: The training montage in Rocky shows transformation. The Godfather's baptism scene, intercut with murders, shows the character's duality. Up portrays Carl and Ellie's life beautifully through montage.
- Modern Applications: Travel vloggers use montages to condense trips. Product videos showcase features through quick cuts.
Historical Context and Evolution
Soviet filmmaker Sergei Eisenstein pioneered montage theory. He explored creating meaning through juxtaposition. Directors like Darren Aronofsky (Requiem for a Dream) pushed the technique further. He used it to depict psychological states. Rocky, spearheaded by Sylvester Stallone, made the training montage a staple. Edgar Wright (Shaun of the Dead, Baby Driver) uses a modern, fast-paced style.
Practical Tips for Using Montage
- Plan Your Shots: Storyboard for a logical flow.
- Music Selection is Key: Music should complement the narrative.
- Maintain Logical Progression: Ensure clarity, even with quick cuts.
- Vary Shot Types: Mix different angles for visual interest.
- Consider Speed Ramping: Varying clip speed adds emphasis.
- Keep Clips Brief: Short clips maintain a dynamic pace.
Montage editing is a versatile technique. It conveys information and emotion effectively. By understanding its principles and applying these tips, you can improve your video storytelling.
4. B-Roll Integration and Match Cuts
B-roll integration and match cuts are fundamental video editing techniques that elevate storytelling and viewer engagement. B-roll refers to supplementary footage interspersed with your primary footage (A-roll), such as interviews or narration. Match cuts, on the other hand, create precise transitions where a visual element in one shot seamlessly connects to a similar element in the next. This connection creates a smooth, often symbolic, flow. Together, these techniques transform static video into dynamic, visually rich narratives.

Why are these techniques so important? Capturing and maintaining audience attention is paramount. B-roll and match cuts provide a powerful solution. They break the monotony of static shots, visually illustrating concepts discussed in the audio. They also add a layer of professional polish, setting compelling content apart.
Why These Techniques Matter
These techniques are particularly valuable for publishers, media companies, and content creation teams striving for high-quality video. They offer a range of benefits:
- Visual Variety: B-roll keeps viewers engaged, preventing visual fatigue.
- Meaningful Connections: Match cuts create a sense of continuity and purpose between scenes, guiding the viewer's eye.
- Simultaneous Audio and Visuals: B-roll lets you maintain audio from one clip while showing relevant visuals. Imagine continuing an interview while showing footage related to the discussion.
- Visual Storytelling: B-roll can add depth to your narrative through visual metaphors, going beyond dialogue.
- Smoother Pacing: Avoid jarring jump cuts with B-roll and match cuts for a more professional feel.
- Enhanced Production Value: These techniques elevate production value significantly without extensive dialogue or expensive equipment.
Pros and Cons of B-Roll and Match Cuts
Let's look at the advantages and disadvantages:
| Pros | Cons |
|---|---|
| Breaks monotony of static shots | Requires shooting extra B-roll footage |
| Illustrates concepts visually | Match cuts need careful planning and execution |
| Creates professional polish | Poor B-roll selection can distract from the main message |
| Match cuts guide viewers' attention | Can feel repetitive if the same B-roll is used often |
| Adds production value without dialogue | Time-consuming to organize and implement effectively |
Examples in Action
Here are a few examples of B-roll and match cuts in use:
- 2001: A Space Odyssey: The iconic bone-to-spaceship match cut is a classic example of conveying complex ideas visually.
- Documentaries: B-roll footage provides context and visualizes interview topics.
- Vlogs (e.g., Casey Neistat): Frequent B-roll keeps the pace dynamic.
- Cooking Shows: Cuts between chef instructions and ingredient close-ups engage and educate.
- Travel Videos: Scenic footage complements narration, immersing the viewer.
Tips for Implementation
- Shoot B-roll with varied focal lengths and perspectives.
- Plan match cuts meticulously, considering composition and movement.
- Ensure B-roll relevance to the accompanying audio.
- Record extra B-roll for editing flexibility.
- Maintain continuity (lighting, time of day) when integrating B-roll.
- Use slow-motion B-roll for emphasis and emotional impact.
Evolution and Popularization
While filmmakers like Alfred Hitchcock pioneered match cuts, documentary filmmakers, such as Ken Burns, developed the use of B-roll for storytelling. News and television production standardized these practices. YouTubers like Peter McKinnon and Mark Rober now showcase these techniques to new content creators, demonstrating their effectiveness in online engagement.
By mastering B-roll integration and match cuts, creators significantly enhance video quality, captivating viewers with impactful messages. These techniques are now essential tools for effective visual communication.
5. Dynamic Text Animation
Dynamic text animation breathes life into static text, transforming it into a compelling storytelling medium. It involves crafting moving, animated typography that seamlessly blends with video content. This helps emphasize key information, provide supplementary details, and enhance the overall narrative. It elevates basic text overlays into captivating visuals, potentially tracking subjects, interacting with the video's environment, or reinforcing brand identity through stylistic choices, ultimately boosting viewer retention.
This technique goes beyond mere flashy effects. It strategically uses motion to guide the viewer's attention and improve understanding. Think of motion graphics highlighting dialogue or key statistics, text that follows subjects within the video frame, or kinetic typography conveying emotion through movement. These elements contribute to a more immersive and informative viewing experience. By integrating text with video elements through masking and tracking in programs like After Effects, dynamic text becomes woven into the visual story, rather than appearing as a superficial addition.
Benefits of Dynamic Text Animation
The advantages of dynamic text animation are numerous:
- Increased information retention: Visual emphasis makes key facts and figures more memorable.
- Professional polish: This is particularly valuable for educational content, giving it a sleek, modern feel.
- Improved comprehension: Statistics and key takeaways become easier to grasp.
- Multilingual content delivery: Animated subtitles make content accessible to a wider audience.
- Enhanced engagement: Static information is transformed into dynamic content, keeping viewers captivated.
Real-World Examples
Several prominent brands leverage dynamic text animation effectively:
- Vox Explainer Videos: Statistics animate alongside narration, reinforcing the data's impact.
- Tasty Food Videos: Measurements appear next to ingredients, making recipes easier to follow.
- Wired Tech Breakdowns: Dynamic text defines complex terminology, enhancing clarity.
- Apple Product Videos: Specs are presented alongside product features in a sleek, informative style.
- Social Media Ads: Animated call-to-action text encourages conversions.
These diverse examples showcase how dynamic text animation can achieve various communication goals across different industries.
Challenges and Best Practices
While powerful, dynamic text animation presents some challenges:
- Technical demands: It can be time-consuming and requires proficiency in motion graphics software.
- Potential for distraction: Overuse can detract from the core video content.
- Legibility concerns: Text must remain readable regardless of background changes.
- Staying current: Maintaining a relevant style requires ongoing updates and attention to design trends.
Consider these tips for effective implementation:
- Consistency: Maintain consistent animation styles for cohesive branding.
- Readability: Ensure text remains on-screen long enough (at least 2-3 seconds).
- Pacing: Factor in reading speed and cognitive load.
- Contrast: Use contrast and shadows to improve legibility.
- Synchronization: Synchronize animations with audio cues.
- Templates: Create templates for recurring animations to save time.
For a deeper dive, check out: Our guide on mastering text and video overlays.
Influences and Evolution
The rise of dynamic text animation can be traced back to pioneers like Saul Bass, whose title sequences revolutionized cinematic storytelling. Modern After Effects artists like Evan Abrams and Mt. Mograph have further advanced the technique. Apple's product presentations, explainer video companies like Kurzgesagt, and YouTube educators like MKBHD and Vox have also refined and popularized its use, cementing its role as a vital video editing technique.
A Powerful Tool for Modern Content
Dynamic text animation effectively bridges the gap between visual storytelling and information delivery. It’s a valuable tool for publishers, media companies, content creation teams, ad sales teams, editorial teams, e-commerce teams, and digital marketing teams. It enhances engagement, strengthens brand identity, and ensures core messages resonate with the target audience.
6. Sound Design and Audio Sweetening
Sound design and audio sweetening are often overlooked, yet they are critical for elevating video quality. These processes enhance, create, and manipulate audio to build an immersive soundscape that strengthens your visual storytelling. While polished visuals are essential, sound design often works subtly, deeply affecting viewers' emotional engagement and overall perception.
This involves several techniques:
- Layered Sound Effects: Combining multiple sounds creates realistic and impactful audio, like the layered crunch of footsteps on gravel or a car engine's roar.
- Foley Artistry: Crafting custom sound effects in a studio, often using everyday objects in unusual ways, allows for precise control and unique audio textures.
- Audio Cleanup: Removing unwanted noise such as hums, hisses, and clicks improves clarity and professionalism.
- Music Selection and Scoring: Choosing music that complements the emotional tone, or commissioning original scores, creates a bespoke soundscape.
- Mixing and Balancing: Carefully adjusting dialogue, sound effects, and music levels creates a harmonious audio experience.
- Spatial Audio Design: Using techniques like panning and reverb creates a sense of space and depth, making the audio more immersive.
Benefits of Sound Design
Dedicating time to sound design offers numerous advantages:
Pros:
- Significantly improves perceived production quality, making videos feel professional and polished.
- Evokes emotional responses beyond visuals alone, increasing viewer engagement.
- Enhances storytelling through auditory cues, adding layers of meaning.
- Establishes location and time period using ambient sounds and music.
- Directs viewer attention through sound emphasis on key moments.
- Can salvage audio issues from the original production, rescuing usable footage.
Cons:
- Often undervalued by beginners, resulting in underdeveloped soundscapes.
- Quality sound design is time-consuming, requiring patience and attention to detail.
- Demands specialized knowledge and a trained ear for informed decisions.
- Quality sound effects libraries can be costly.
- Copyright challenges for music require careful selection and licensing.
Examples of Effective Sound Design
The impact of sound design is evident in many examples: the synchronized action in Baby Driver, the immersive drumming in Whiplash, the detailed audio in ASMR videos, the minimal soundscape of A Quiet Place, and responsive audio effects in gaming channels. These show how sound elevates the viewing experience.
Pioneers like Walter Murch (Apocalypse Now), Ben Burtt (Star Wars), and Hans Zimmer, along with contemporary designers like Skip Lievsay and Richard King, have pushed the boundaries of sound design. YouTube creators like Film Riot and Potato Jet emphasize audio's importance for aspiring filmmakers.
Implementing Effective Sound Design
Here are a few tips:
- Record room tone at each location for consistent background sound.
- Use audio transitions (crossfades) between clips for smooth edits.
- Add subtle ambient sounds to establish the environment.
- Normalize audio levels for consistent volume throughout the video.
- Use compressors for clearer, more consistent dialogue.
- Layer multiple sound effects to create realistic impacts.
For more audio enhancement tips, see our guide on creating professional voice-overs: Our guide on creating professional voice-overs.
Sound design is an essential element that separates amateur from professional content. By understanding and implementing these techniques, you can enhance your videos, engage your audience, and tell more compelling stories.
7. Pacing and Rhythm Editing
Pacing and rhythm editing is crucial for transforming video content from basic documentation into compelling narratives. It involves adjusting the duration and sequence of shots to manage the video's energy, emotional impact, and viewer engagement. By strategically changing the speed of edits, you direct the viewer's attention, build tension, highlight key moments, and maintain interest throughout. This makes it a fundamental aspect of both entertainment and commercial video production.
This technique relies on several key features: varying shot lengths to control energy, building and releasing tension through editing rhythm, syncing cuts with audio or dialogue, using both rapid cuts and lingering shots, and gradually accelerating or decelerating the edit pace.
Why Is Pacing Important?
Pacing and rhythm editing directly impact how your audience experiences your video. It can be the difference between a bored viewer and a captivated one. This technique lets you enhance storytelling without needing additional footage, making simple content dynamic and professional. It empowers you to create a distinct style and energy for your content, setting it apart.
Pros and Cons of Pacing and Rhythm Editing
Let's explore the advantages and disadvantages of this powerful editing technique:
| Pros | Cons |
|---|---|
| Controls viewer attention and emotion | Easy to overdo, creating a distracting experience |
| Creates distinctive style and energy | Requires intuition for timing and viewer psychology |
| Maintains engagement, prevents monotony | May sacrifice clarity for style |
| Enhances storytelling without extra footage | Takes practice to develop a consistent rhythm |
| Makes simple content dynamic and professional | Platform-specific considerations (e.g., faster pacing for social media) |
Real-World Examples of Effective Pacing
- Edgar Wright: Known for his rhythmic editing in films like Baby Driver and Scott Pilgrim vs. the World. He often syncs cuts to the music, creating a visceral experience.
- Whiplash: The editing mirrors the intensity of jazz drumming, using fast cuts and close-ups to build tension and reflect the protagonist's drive.
- Apple Product Videos: Apple uses pacing to highlight product design and functionality. Slow shots emphasize aesthetics, while quick cuts showcase features.
- Christopher Nolan: Dunkirk demonstrates masterful pacing, intercutting timelines to build suspense and amplify the emotional impact.
- TikTok: The platform's rapid-fire editing caters to short attention spans and encourages dynamic content.
Historical Context and Evolution
Pacing and rhythm editing's foundations trace back to Sergei Eisenstein's montage theories and Alfred Hitchcock's suspense-building techniques. Thelma Schoonmaker, Martin Scorsese's editor, refined these techniques. Music video directors like Michel Gondry pushed creative boundaries, influencing contemporary video creators for platforms like YouTube.
Practical Tips for Implementation
- Vary Shot Lengths: Use faster cuts for high-energy sequences, and longer shots for emotional moments.
- Match Pacing to Audience and Platform: Faster pacing suits social media, while slower pacing might be appropriate for documentaries.
- Use Music as a Guide: Music helps establish a consistent rhythm.
- Create Contrast: Juxtaposing fast and slow sections creates impact.
- Consider the "Energy Curve": Plan the overall pacing, building toward peaks and allowing for slower moments.
By understanding and implementing pacing and rhythm editing, you significantly improve your video content's impact, capturing your audience's attention from start to finish.
8. Visual Effects and Motion Graphics Integration
Visual effects (VFX) and motion graphics integration involve incorporating computer-generated imagery, animations, and graphical elements into video footage. This powerful technique enhances storytelling, creates impossible scenarios, or visualizes abstract concepts, taking your videos to the next level. From subtle enhancements like sky replacements to complex compositing of 3D elements, VFX allows creators to expand their visual storytelling beyond the capabilities of a camera.
This technique deserves recognition for its ability to significantly elevate video content quality and audience engagement. Features like screen replacements for devices, particle effects for energy or environmental elements, and animated infographics add a new dimension to video production.
Expanding Creative Possibilities With VFX
Other valuable VFX features include:
- Green screen compositing
- 3D object integration
- Advanced techniques like tracking, masking, and rotoscoping
These open up a world of creative possibilities. Imagine seamlessly integrating a 3D product model into a live-action scene or visualizing complex data with engaging motion graphics. These are just a few examples of how VFX and motion graphics can transform your videos.
VFX and motion graphics offer numerous advantages. They create visual possibilities beyond physical filming limitations, enabling the visualization of abstract concepts or data. This adds significant production value and visual interest, captivating your audience.
Advantages of Using VFX
- Expands visual possibilities beyond filming limitations
- Visualizes abstract concepts and data
- Increases production value and visual interest
- Fixes filming issues in post-production, saving time and resources
- Creates unique branding and style elements
However, there are also challenges to consider. VFX often requires specialized software knowledge and can be time-consuming and processing-intensive. Adobe After Effects is a popular choice for motion graphics and VFX. Improper VFX implementation can appear amateurish, undermining your message.
Challenges of VFX
- Requires specialized software knowledge
- Can be time-consuming and processing-intensive
- Poor implementation can look amateurish
- Hardware requirements for complex effects can be substantial
- Requires ongoing learning due to constant technical evolution
Real-world examples of effective VFX and motion graphics integration are plentiful. Corridor Digital's YouTube content is renowned for its creative use of VFX. Wired's "Technique Critique" series effectively utilizes informational graphics. Marvel movies seamlessly integrate CGI characters with live action, and educational channels leverage VFX to visualize scientific concepts.
Practical Applications of VFX
Even product videos benefit from animated feature callouts, enhancing viewer understanding. You might be interested in: Our guide on animating images with parallax effects for adding subtle yet effective motion to your visuals. Blackmagic Design Fusion is another powerful compositing software used in professional VFX workflows.
The evolution of VFX and motion graphics is intrinsically linked to pioneers like Industrial Light & Magic, who pushed the boundaries of the field with their work on Star Wars. Video Copilot's Andrew Kramer has democratized access to VFX knowledge through his popular After Effects tutorials, while YouTube VFX artists like Captain Disillusion educate audiences on the art and science behind visual effects.
Getting Started With VFX
To get started with VFX, consider these practical tips:
- Start with simple effects and gradually increase complexity.
- Plan for VFX during shooting by using tracking markers and ensuring proper lighting.
- Utilize pre-built templates to save time on common effects.
- Match lighting and camera movement for realistic integration.
- Render in stages to identify issues early.
- Consider using stock VFX elements for efficiency.
By following these guidelines, you can effectively leverage the power of VFX and motion graphics to enhance your video content and captivate your target audience.
8-Point Video Edit Tips Comparison
| Technique | 🔄 Complexity | ⚡ Resources | 📊 Outcomes | 💡 Ideal Use Cases | ⭐ Advantages |
|---|---|---|---|---|---|
| J-Cut and L-Cut Transitions | Medium – needs precise audio editing | Basic editing software and audio skills | Smoother transitions with enhanced narrative flow | Interview footage, dialogue scenes, documentaries | Reduces jarring cuts; enhances storytelling |
| Color Grading and LUTs | High – requires color theory expertise | Advanced color grading software (e.g., DaVinci Resolve, LUTs) | Professional, visually consistent footage | Films, commercials, travel vlogs | Instantly elevates visual quality; builds brand identity |
| Montage Editing | Medium – demands careful planning and timing | Standard editing software with music synchronization capability | Compressed storytelling with strong emotional impact | Social media videos, transformation sequences, training clips | Engages viewers; creates dynamic pacing |
| B-Roll Integration and Match Cuts | High – involves meticulous shot matching | Extra footage, detailed shot lists, and robust editing software | Visually dynamic transitions and narrative depth | Documentaries, interviews, travel videos | Adds production value; avoids monotony |
| Dynamic Text Animation | High – technically challenging with motion graphics | Specialized motion graphics software (e.g., After Effects) | Enhanced viewer engagement and information retention | Educational content, explainer videos, social media ads | Polished, branded visuals; reinforces key points |
| Sound Design and Audio Sweetening | High – complex layering and mixing | Professional audio software and extensive sound libraries | Immersive, emotionally resonant audio environment | Films, documentaries, gaming channels | Dramatically improves production quality; heightens emotion |
| Pacing and Rhythm Editing | Medium/High – requires intuitive timing | Robust editing tools with audio synchronization | Controlled viewer engagement and dynamic storytelling | Action sequences, suspense scenes, social media content | Guides attention; creates energetic, balanced flow |
| Visual Effects and Motion Graphics Integration | Very High – advanced compositing skills needed | High-end software (After Effects, DaVinci Fusion) & powerful hardware | Expanded creative possibilities with stunning visuals | Sci-fi productions, commercials, creative storytelling projects | Overcomes filming limits; enables unique branding |
Ready to Edit Like a Pro?
From mastering essential transitions like J-Cuts and L-Cuts to understanding the nuances of color grading, montage editing, and dynamic text animation, you now possess a robust toolkit for crafting compelling video content. Remember the significance of seamless B-roll integration, impactful sound design, and maintaining a consistent pace and rhythm to keep your viewers engaged. By thoughtfully incorporating visual effects and motion graphics, you can further elevate your videos and achieve a truly professional look.
Putting these concepts into practice involves experimentation and iteration. Don't hesitate to explore different techniques, analyze what resonates with your audience, and refine your approach based on the feedback you receive. Developing a unique editing style is an ongoing journey, and continuous learning is vital for staying ahead of the curve.
The world of video editing is constantly evolving, with new trends and technologies constantly emerging. Staying abreast of these developments, from AI-powered editing tools to new visual effects capabilities in software like Adobe After Effects, allows you to push your creative boundaries and produce even more captivating content.
Key Takeaways
Master the Fundamentals: Strong editing is built on a solid understanding of core concepts like transitions, color grading, and sound design.
Find Your Style: Experiment with various techniques to develop a unique approach that reflects your brand identity.
Embrace Continuous Learning: Stay informed about the latest trends and technologies to enhance your skills and maintain a competitive edge.
Practice Makes Perfect: Consistent practice is essential to refine your editing skills and produce professional-quality results.
Ready to elevate your video creation process and save your team valuable time? Aeon, a video creation platform, empowers publishers and media companies to effortlessly transform text, video, or audio content into engaging video formats. Using AI, Aeon automates video production, incorporating voice customization, text-to-video conversion, and social media formatting while maintaining brand consistency and editorial control. From boosting ad sales and driving e-commerce conversions to optimizing editorial workflows, Aeon offers a scalable solution to enhance efficiency, engagement, and revenue growth. Visit Aeon today and discover how you can create professional-quality videos at scale.
Share the article


Contributor

.jpg)