Turning your slide deck into a video is one of the smartest things you can do to get more eyes on your work. The simplest way is right inside PowerPoint itself—just use the "Export" or "Save As" feature to create an .mp4 file. This neat trick packages all your slides, timings, and animations into a single, easy-to-share video.
Why Turn Your PowerPoint Into a Video

Let's be honest: hitting "export" is the easy part. The real magic is in why you're doing it. Moving from static slides to a dynamic video is a strategic play that completely changes how people interact with your content. In a world of short attention spans, a video is just so much easier to consume and share than a deck.
Think about it. When someone sends you a .pptx file, it’s a chore. You have to download it, make sure you have the right software, and then manually click through everything. A video? It just plays. Instantly. On any phone, tablet, or computer. That accessibility makes your message land with much more impact.
Expanding Your Reach and Impact
Once you start thinking in terms of video, the possibilities are everywhere. A sales team can transform their standard pitch into a compelling video that works as a lead magnet on their website or as a standout piece of content for LinkedIn. Prospects can get the gist of the value proposition on their own terms, without needing to schedule a live demo right away.
It's the same story for educators and corporate trainers. Lecture slides can be reborn as on-demand video lessons. This allows students and new hires to go back and re-watch tricky concepts or review key points before a test. Shifting from still images to motion and sound just makes information stick.
When you turn a presentation into a video, you’re creating a self-sufficient, versatile asset. You can drop it on social media, embed it in a blog post, or include it in an email campaign, and you can be confident your message is being delivered perfectly every single time.
Capitalizing on the Power of Video Marketing
The numbers don't lie. The video marketing world is booming for a reason. A staggering 91% of businesses now rely on video as a core marketing tool. Websites that include video see conversion rates jump from 2.9% to 4.8% on average. And on e-commerce landing pages? Video can boost conversions by an incredible 80%.
But before you get lost in the technical details of exporting, remember this: a great video can't save a bad presentation. Your starting point has to be solid. Take the time to understand what makes a good presentation first. If your core message isn't clear and compelling on the slides, adding motion and audio won't fix it. Get the foundation right, and your final video will have a real chance to connect with your audience and hit its mark.
Using PowerPoint's Built-In Video Exporter
You don’t actually need fancy video software to turn your slide deck into a polished video. PowerPoint has a powerful video creator built right in, letting you convert a static presentation into a dynamic MP4 file with just a few clicks. Learning how to use this native tool is the fastest way to get your content ready for a wider audience.
The real magic here is that the exporter captures everything—not just your slides. It bakes in all the timings, narrations, animations, and transitions you’ve already perfected. When you export, PowerPoint essentially "records" a flawless run-through of your presentation and packages it all into a single, easy-to-share video file.
Getting Your Slides Ready for Prime Time
Before you even think about exporting, your presentation needs to be truly video-ready. This is more than just spell-checking. It means making sure your animations and transitions are timed for someone watching passively, not for a live audience where you control the rhythm.
Do a full rehearsal in "Presenter View." Watch the flow like a hawk. Do bullet points fly in too fast? Does a transition feel abrupt? Fine-tuning these details is what separates an amateur video from a professional one. Remember, your audience can't ask you to slow down; the pacing you set is all they get.
One common mistake I see all the time is linking to media files on a local computer instead of embedding them. This always breaks the video export. Make sure any audio or video clips are fully embedded in the .pptx file itself to avoid those frustrating export errors.
Navigating the Export Settings
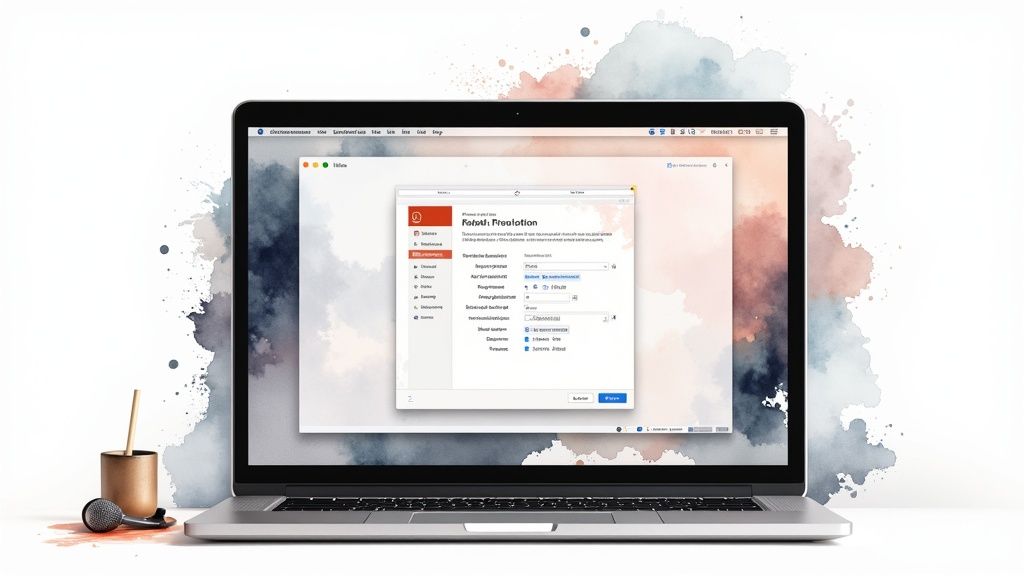
Once your slides are polished, you're ready to create your video. Head over to File > Export > Create a Video. This opens up a simple menu that gives you complete control over the final output.
This screen is your command center for the whole process. The two most important settings are the video quality (resolution) and whether to include your recorded timings and narrations. Getting these right is the difference between a crisp, professional video and a pixelated, silent one.
Choosing Your PowerPoint Video Export Settings
Picking the right resolution is a balancing act between visual quality and file size. What works for a giant conference screen will be overkill for an email attachment. This table breaks down the best use cases for each native PowerPoint export setting so you can choose with confidence.
For almost any social media or general web use, Full HD (1080p) is your safest and best bet. It looks sharp, professional, and won't give your viewers headaches with buffering.
Making Sure Your Voice Is Heard
The second critical setting is the dropdown for timings and narrations. This is where you tell PowerPoint how to pace the video and whether to include your voiceover.
You’ve got two choices:
- Don't Use Recorded Timings and Narrations: This creates a basic slideshow where each slide appears for a fixed amount of time (which you can set in the "Seconds spent on each slide" box). It's really only useful for simple, silent loops, like for a trade show kiosk.
- Use Recorded Timings and Narrations: This is the one you’ll want 99% of the time. It tells PowerPoint to use the precise timings from your rehearsal and to include any audio you’ve recorded. Forgetting this setting is the single most common reason I see for videos exporting without sound.
By selecting "Use Recorded Timings and Narrations," you're ensuring the final video is an exact replica of your perfectly rehearsed presentation—complete with your voiceover, laser pointer movements, and triggered animations. It's the key to making your video feel human and engaging.
This isn't just a niche trick; it's a mainstream content strategy. Presentation videos now account for 53% of all video marketing use cases, right behind explainer videos (73%) and social media videos (69%). It's clear that turning slide decks into video is a core tactic for modern publishers. You can dig into more video marketing trends in the full report.
Adding Professional Narration and Captions

Turning your PowerPoint into a silent movie is a huge missed opportunity. Your voice provides context, personality, and that crucial human touch that static slides just can't deliver. To really make an impact, you need to layer in quality audio and ensure your message is accessible to everyone with captions.
This isn’t about sounding like a professional voice actor. It's about being clear, confident, and easy to follow. And with a few simple tricks, you can record some seriously polished narration right inside your presentation.
Recording Clear and Confident Narration
Bad audio will sink your video faster than anything else. If your voice sounds muffled, distant, or echoey, viewers are going to click away in seconds. While PowerPoint has a built-in recorder, your laptop’s microphone usually isn't going to cut it.
An external USB microphone is the single best investment you can make for a massive jump in quality. Something like an Audio-Technica ATR2100x gives you fantastic clarity without breaking the bank. These mics are built to capture your voice cleanly while filtering out distracting background noise like keyboard clicks or room echo.
Of course, the gear is only half the battle. Your delivery is just as important.
- Script it out. Don't just wing it. A script, even if it's just detailed talking points for each slide, keeps you from rambling or getting stuck in awkward pauses. It helps you stay on track and maintain a smooth, deliberate pace.
- Find a quiet spot. Your recording environment matters. A room with soft surfaces—think carpets, curtains, even a closet full of clothes—will absorb sound and kill that echo, leaving you with a much cleaner track.
- Bring the energy. It can feel a little strange talking to your screen, so you have to consciously inject some enthusiasm into your voice. A great tip? Smile when you speak. It genuinely makes you sound warmer and more engaging.
Pro tip: It’s much easier to edit out mistakes later than to constantly stop and restart. If you stumble over a word, just pause, take a breath, and say the sentence again. You can easily snip out the flub later with any basic video editor.
The Critical Role of Captions for Engagement
Once you’ve nailed the narration, it's time to add captions. This isn't just an accessibility box to tick anymore—it's a fundamental part of a smart video strategy. A massive number of videos on social media are watched with the sound off, especially on phones. If you don't have captions, your message is completely lost on that silent majority.
Captions also make your video more searchable, boost comprehension for non-native speakers, and let people watch in loud places. They turn a passive viewing experience into a versatile piece of content that works anywhere. For a deeper dive, our guide on how to add subtitles to videos breaks it all down.
Adding and Styling Captions
Thankfully, newer versions of PowerPoint have made adding captions much more straightforward. You can upload a standard caption file, typically in .vtt format, which contains all your text precisely timed to your audio.
Plenty of third-party services can automatically generate these files from your audio, saving you hours of painful manual transcription. Once you import the file into PowerPoint, you can usually adjust the style and position to make sure the text is readable without covering up key visuals on your slide.
If you plan to polish your video in a separate editor after exporting, you’ll find that most have even better captioning tools. These give you fine-grained control over the font, size, color, and background, helping you align the captions perfectly with your brand's style. Whether you add them in PowerPoint or a dedicated editor, the goal is the same: make sure every word is represented on screen, making your video universally effective.
Simple Edits to Polish Your Final Video
Getting your presentation exported out of PowerPoint is a huge milestone, but the work isn't quite done. Think of that raw video file as a rough draft. With just a few simple edits, you can elevate it from a basic recording into a polished, professional asset that truly connects with your audience.
The good news? You don't need to be a video editing guru to make these changes. Many free and easy-to-use tools have everything you need. These small post-production touches are what separate memorable content from the forgettable kind.
Trimming and Topping Off Your Video
The very first thing I always do is trim the beginning and end of the video. It's nearly impossible to hit record, take a breath, and start speaking perfectly—or to stop the recording the exact millisecond you finish. This almost always leaves a few awkward seconds of silence, a fumbled mouse click, or a lingering view of your desktop.
Chopping off those clumsy moments is an instant fix that makes your video feel much more professional. Most basic video editors, including the ones that come with Windows and macOS, make this simple. You just drag the edges of the video timeline to get clean cuts.
Once you’ve got a tight edit, think about adding a branded intro and outro.
- Intro Clip: A quick 3-5 second animation with your logo can work wonders. It sets the stage and immediately establishes your brand.
- Outro Clip: This is your prime real estate for a call to action. Add your website, social handles, or a clear "subscribe now" prompt.
These elements act like bookends, giving your video a complete, intentional feel. It’s a clear signal to the viewer that this is a carefully produced piece of content, not just a raw screen recording.
Layering in Music and Sound
Background music is an incredibly effective tool for setting the mood and keeping your viewers tuned in. A subtle instrumental track can fill any quiet moments and simply make the whole experience more pleasant. The trick is to pick music that actually fits the tone—something upbeat and energetic for a marketing video, or maybe something more calm and focused for a technical tutorial.
When you add music, you absolutely have to get the volume right. It needs to sit quietly underneath your narration, never competing with it. If the music is too loud, it stops being a helpful addition and quickly becomes a major distraction. Your voice must always be front and center.
Think of background music as the frame for a picture. It shouldn't overpower the art itself, but the right frame makes the entire piece look more complete and professional. Getting this balance right is a simple but impactful editing step.
Reformatting for Every Platform
Your standard 16:9 widescreen video is perfect for YouTube or your website, but it's a poor fit for most social media feeds. To get the most mileage out of your content, you have to reformat it for where your audience will actually see it.
A great place to start is creating a square (1:1 aspect ratio) version for Instagram and LinkedIn. Square videos take up significantly more screen space on a phone, which is proven to grab more attention and boost engagement.
For platforms like Instagram or Facebook Stories, you’ll want a vertical (9:16 aspect ratio) cut. This often means re-centering your most important visuals and text to fit that tall, narrow frame. It’s a bit of extra work, but it creates a far more native and immersive experience for mobile viewers. Understanding the nuances between container types is key, and you can explore this topic in our detailed guide to the most common video file formats explained. Adapting your video this way shows you understand how people actually consume content on different channels.
Scaling Your Video Production with Automation
Exporting presentations one by one is fine when you're just starting out. But what happens when you need to create videos for a major marketing campaign, hundreds of personalized sales proposals, or weekly internal reports? That manual process quickly goes from being manageable to a serious bottleneck.
To truly scale, you have to stop thinking like a manual video creator and start thinking like the architect of an efficient production engine. This means looking beyond PowerPoint’s built-in tools and embracing automation. Modern solutions are built for batch processing, letting you convert entire folders of presentations into videos in one go. This is where you get a massive return on your time and can finally focus on strategy instead of repetitive clicking.
Moving Beyond Manual Creation
The cracks in a manual workflow really start to show the first time you need to update a core piece of information. Imagine your company gets a new logo or updates a key product statistic. You'd have to open every single presentation, make the change, and re-export each one. It's not just tedious—it's a recipe for mistakes and brand inconsistency.
Automation is the answer. With a template-driven system, you can update a single master template, and the changes automatically ripple through all future video outputs. This is how you ensure brand compliance and accuracy at scale, something that’s nearly impossible to manage by hand once you're dealing with more than a handful of videos.
The big idea here is simple: define a process once, then let technology execute it flawlessly hundreds or thousands of times. This shifts video creation from a time-sucking chore into a predictable, scalable system.
How Automated Video Generation Works
Automated video creation platforms are much more than simple file converters. They're designed to connect directly to your sources of data—a CRM, a product database, or even a basic spreadsheet. From there, the process is incredibly powerful:
- Template-Based Design: You start by building a branded PowerPoint template with placeholders for dynamic content. Think
{{customer_name}},{{monthly_sales_figure}}, or{{product_image}}. - Data Integration: Next, you connect your data source to the platform. Each row in your spreadsheet or database becomes a unique video waiting to be made.
- Automated Rendering: The platform then does the heavy lifting, automatically merging the data with your template to generate a unique, personalized video for every single entry.
With this kind of setup, you can automatically generate a custom video for every lead in your sales pipeline, a performance report for each regional manager, or a product showcase for every item in your e-commerce store.
This graphic gives you a sense of the post-production workflow that can be automated to get videos publisher-ready.
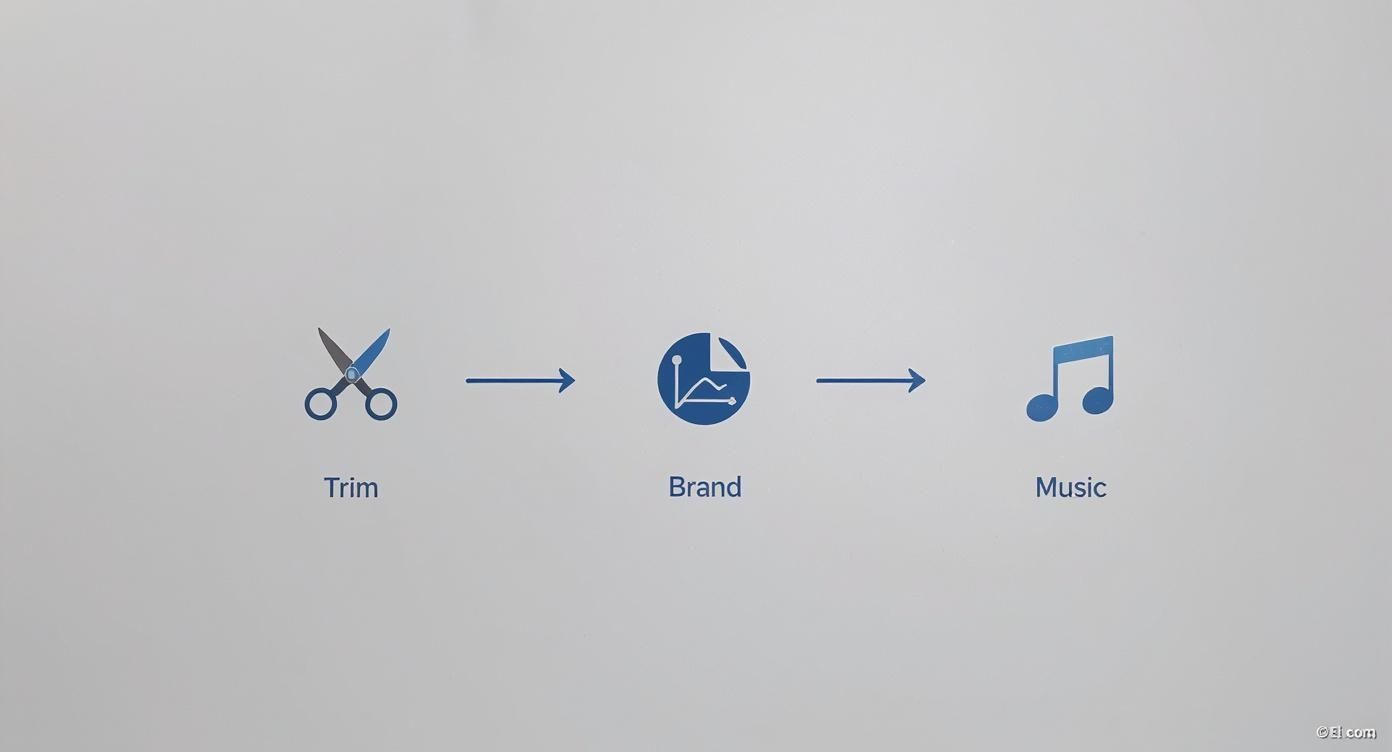 Every step—from trimming clips to adding branding and a music track—can be defined in a template and applied consistently across hundreds of videos.
Leveraging AI for Scalable Production
This whole technological leap is part of a bigger trend: making video creation easier for everyone. Video content now accounts for 60.1% of the average time people spend on social media daily, but making it has always required special skills and expensive software. That’s changing. Modern AI-powered tools can turn static slides into professional videos, complete with talking AI avatars and realistic voiceovers.
Platforms like Aeon are designed for exactly this, giving publishers a way to generate on-brand videos from different content sources with very little manual work. The goal is to shift focus from handling individual files to managing a continuous production workflow. If you're looking to build similar efficiencies into your process, our guide offers proven strategies to automate video creation that will seriously boost your team's output.
Thinking more broadly about automation can also spark some great ideas. Sometimes, looking at how other content challenges are solved—like in this guide on perfect web page screenshot automation—can offer fresh perspectives on building efficient visual production systems. The core principle is always the same: cut down on manual tasks to ramp up speed, consistency, and scale. By adopting this mindset, you can turn your existing PowerPoint assets into a powerful, automated video generation machine.
Common Questions About Making Videos From PowerPoint
When you first dip your toes into turning a PowerPoint into a video, you're bound to hit a few snags. It happens to everyone. Getting ahead of these common questions can save you a ton of rework and help you nail it on the first attempt.
Let's walk through some of the most frequent issues I've seen people struggle with. The fixes are usually simple, but only if you know what to look for.
Will My PowerPoint Animations Work in the Video?
Yes, they absolutely will. PowerPoint's video export is built to capture your animations and transitions exactly as you see them in your presentation. The trick is to use the "Record" feature, which lets you set precise timings for every single animation and slide change. When you export, that recording becomes the blueprint for the video.
A little tip from experience: try to steer clear of overly fast or complex animations. They might look great when you're clicking through the slides on your computer, but they can sometimes come out looking a bit jerky in the final video. Simple, clean animations like "Fade" or "Appear" almost always deliver a smoother, more professional result.
When you select "Use Recorded Timings and Narrations" during the export, you're essentially telling PowerPoint, "Make the video look exactly like my rehearsal." Every click, every pause, every animation is preserved.
What Is the Best Video Format to Export?
For pretty much any use case you can think of, MP4 (using H.264 video encoding) is the way to go. It strikes the perfect balance between high quality and a reasonable file size. More importantly, it’s universally accepted by every social media platform, website, and video player out there.
The good news? PowerPoint defaults to MP4 for its video exports, so you rarely need to change a thing here. Just pick your resolution and you're good to go.
How Can I Make the Exported Video File Smaller?
Huge video files are a nightmare to upload or share. The quickest way to cut down on file size is by choosing a lower resolution when you export.
- Try 720p (HD) instead of 1080p (Full HD). This one change makes a massive difference in file size without a major drop in visual quality. It's perfect for internal communications or sending a video over email.
Another great tool that’s often missed is PowerPoint's own "Compress Media" feature. Before you even think about exporting, head to File > Info > Compress Media. This handy function optimizes any audio or video clips you've embedded in your slides, which can seriously shrink your final file size.
Why Does My Exported Video Have No Sound?
This is, without a doubt, the most common problem people run into. Thankfully, the fix is almost always straightforward. If you export a video and it’s completely silent, check these two things first.
First, did you actually record any narration? It sounds obvious, but it's an easy step to miss. Make sure you've either recorded a voiceover or that any embedded audio files are set to play automatically.
Second—and this is the big one—when you go to File > Export > Create a Video, you must make sure the dropdown menu is set to "Use Recorded Timings and Narrations." If it's set to anything else, PowerPoint will completely ignore your audio and timings. This single setting is the key to making sure your voice actually makes it into the final video.
Ready to move beyond manual exports and produce professional video content at scale? Aeon uses AI to transform your existing content into engaging, on-brand videos automatically. Learn how Aeon can build your video production engine.